From Homeserver to Namecheap: The Short Story
Gary Schafer, 25 April 2012
Here's what I did. When I looked at Namecheap.com to find the best way to transfer my website, I had hoped to find a "set up a website and transfer your domain" link. Alas, I didn't see that. I looked at several options. I looked at the "web hosting" option, but didn't see a further option for "transfer your current domain to Namecheap". Maybe it was there. But I didn't see it. So I selected the link for "transfer domain". I went through that process. THEN I added the "web hosting" option. Two different transactions. And perhaps that's where the problem resides currently.
After I received the "your web hosting is ready", I transferred all of my web page files to the appropriate directory on the Namecheap servers. They're still there, ready to go. They're in the correct directory (public_html) with the correct starting page name (index.htm). But no web page displays yet.
17:04: I just checked the connection. Now when I attempt to go to "www.site2241.net", I get a "internal server error" message. But a check with Wireshark shows that the DNS has now propagated. I should be able to get to the webpage. But I'm not. I did the online tech support chat line. They suggested a way to use the "hosts" in the Windows IP routing table to look at the web page before it's been propagated through DNS. But now it has been propagated, and I'm getting an error message. What's going on?
17:10: Online with "Ally S" from tech support. She's checking.
17:15: Okay, once again, it was because of something I did. I corrupted the file ".htaccess". Here's what "Ally S." said: "You have wrong directory in .htaccess file. It should be DirectoryIndex index.html index.php parking-page.html and not index.html index.php parking-page.html". I had been playing around with that file earlier. Yes, impatience got the better of me. Again. Fortunately, Ally fixed it quickly and the website (as you can tell if you're reading this) is back up in operation. Total down time was less than an hour. I expected at least 8 hours of "no site2241.net".
Regardless, I'm back!
Buh-BYE Homeserver
Gary Schafer, 24 April 2012
This is it. This website will soon transfer from my small, soon-to-be-decommissioned homeserver to Namecheap.com. I began the domain transfer process a few minutes ago. I would have stayed with Dyndns, but they don't provide web hosting. A little bit of web space is all I need. Anyway, Namecheap provides what I want and I want everything (web site and domain registrar) in one place.
What this means is that this web site may be unavailable for some time over the next, few days as I get organized. Bear with me.
UPDATE: If you are reading this, then the site has been successfully migrated to Namecheap. I received the e-mail this morning telling me my web hosting server was ready. The reason that you will only be reading this if the migration has occurred is that I'm only putting this update on the Namecheap site; it will not appear on the webpage from the old server.
The Hidden Background: The Simple Method
Gary Schafer, 10 April 2012
This will (most likely) be the last post in which I explain how to create a hidden background image. I had another epiphany after posting the last method. It turns out that, with one minor modification, I can remove several of the steps from the previous method. In general, rather than create a separate layer for the color, simply use the "Bucket Fill Tool" on the image layer and completely fill it in with the desired color.
Mind you, I was glad I worked out the previous method. I now understand how to transfer layer masks. That will be helpful for future postings.
The general idea here is to use the original image to create a transparency layer mask, then fill in the original image with the color of your choice. This cuts out the steps of having to make a separate layer, then having to copy the transparency layer. Anyway, here we go.
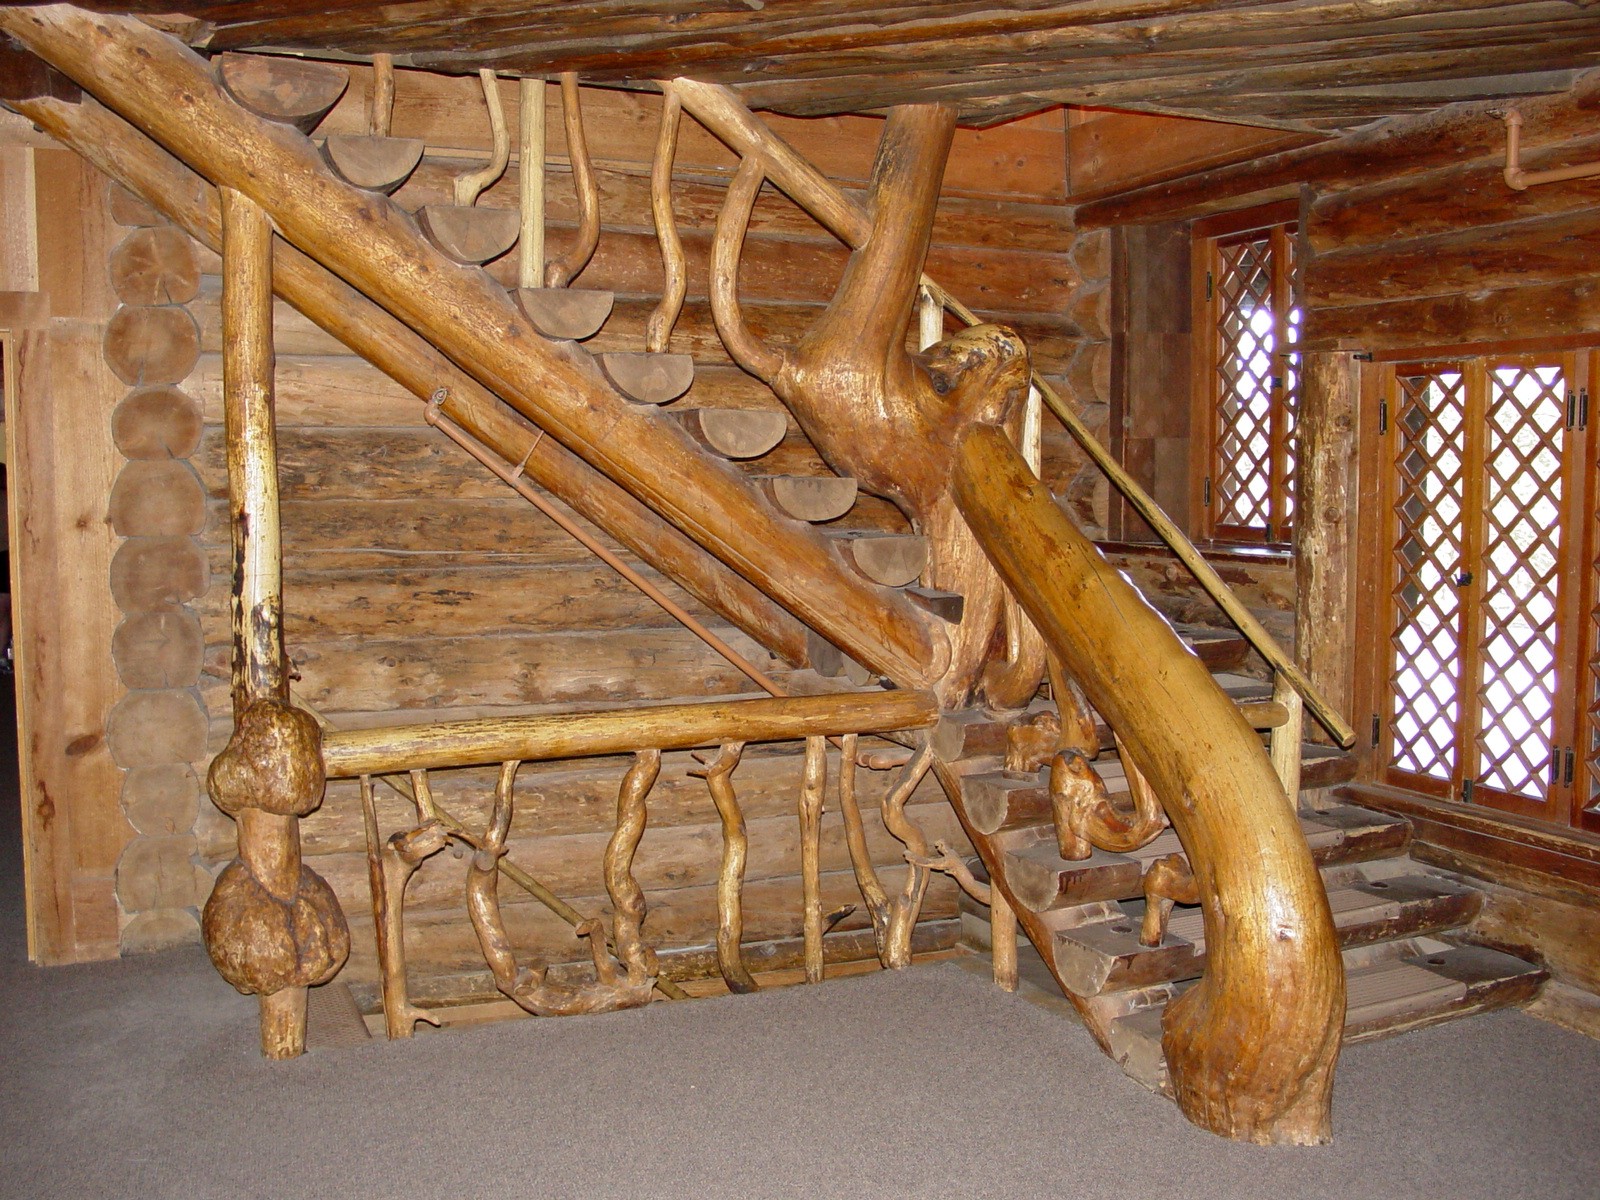
- Open the image you want to use. Again, I'm going to use the staircase image taken in the Old Faithful Inn in Yellowstone Park.
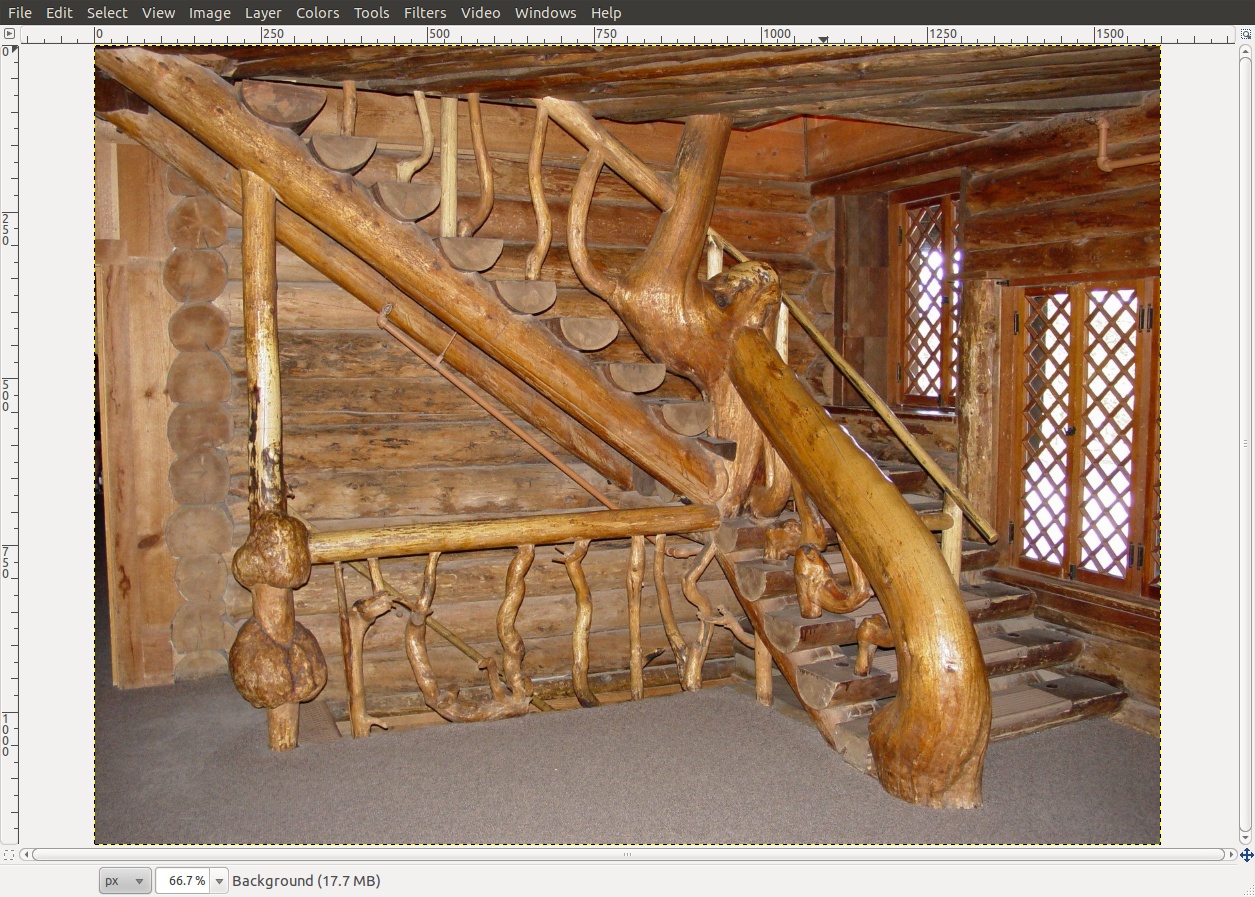
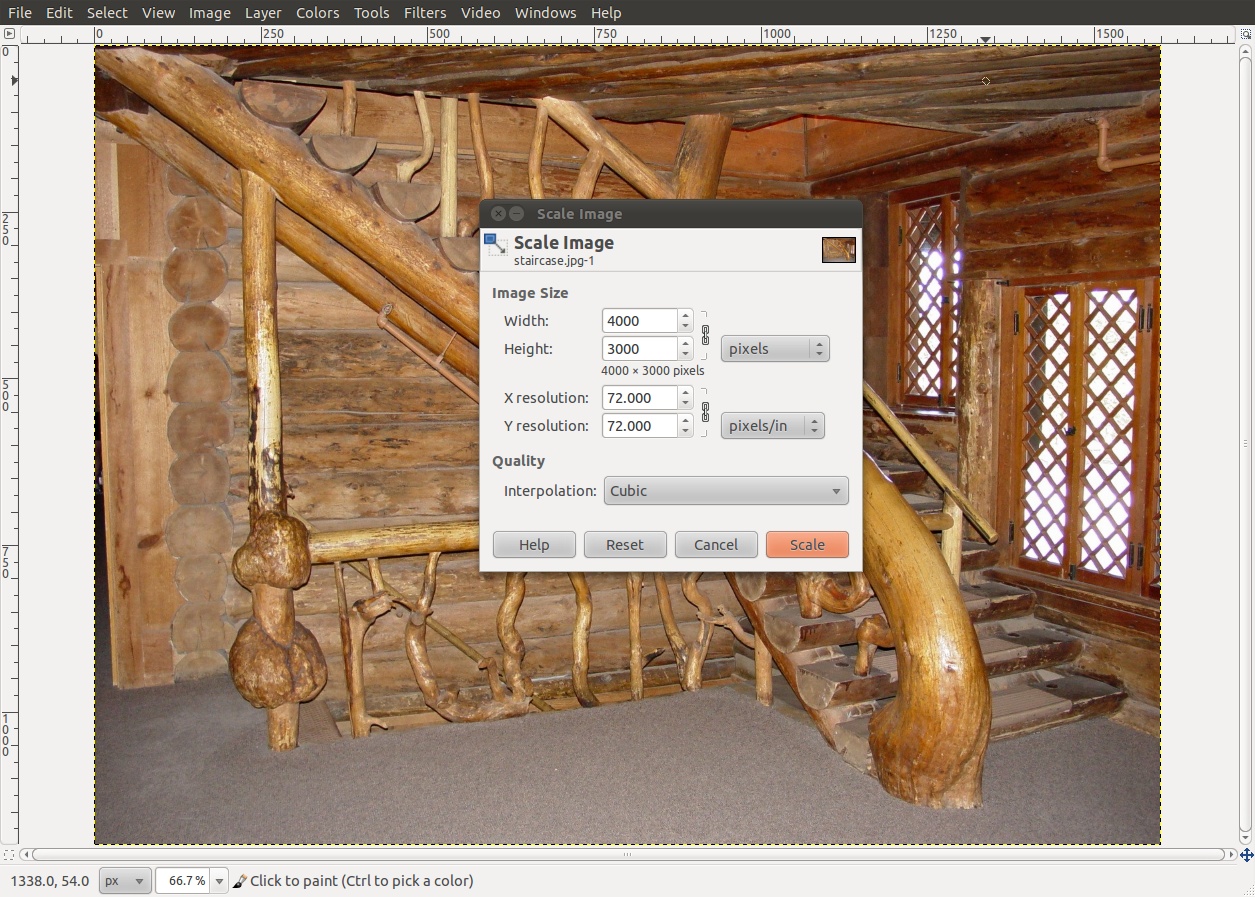
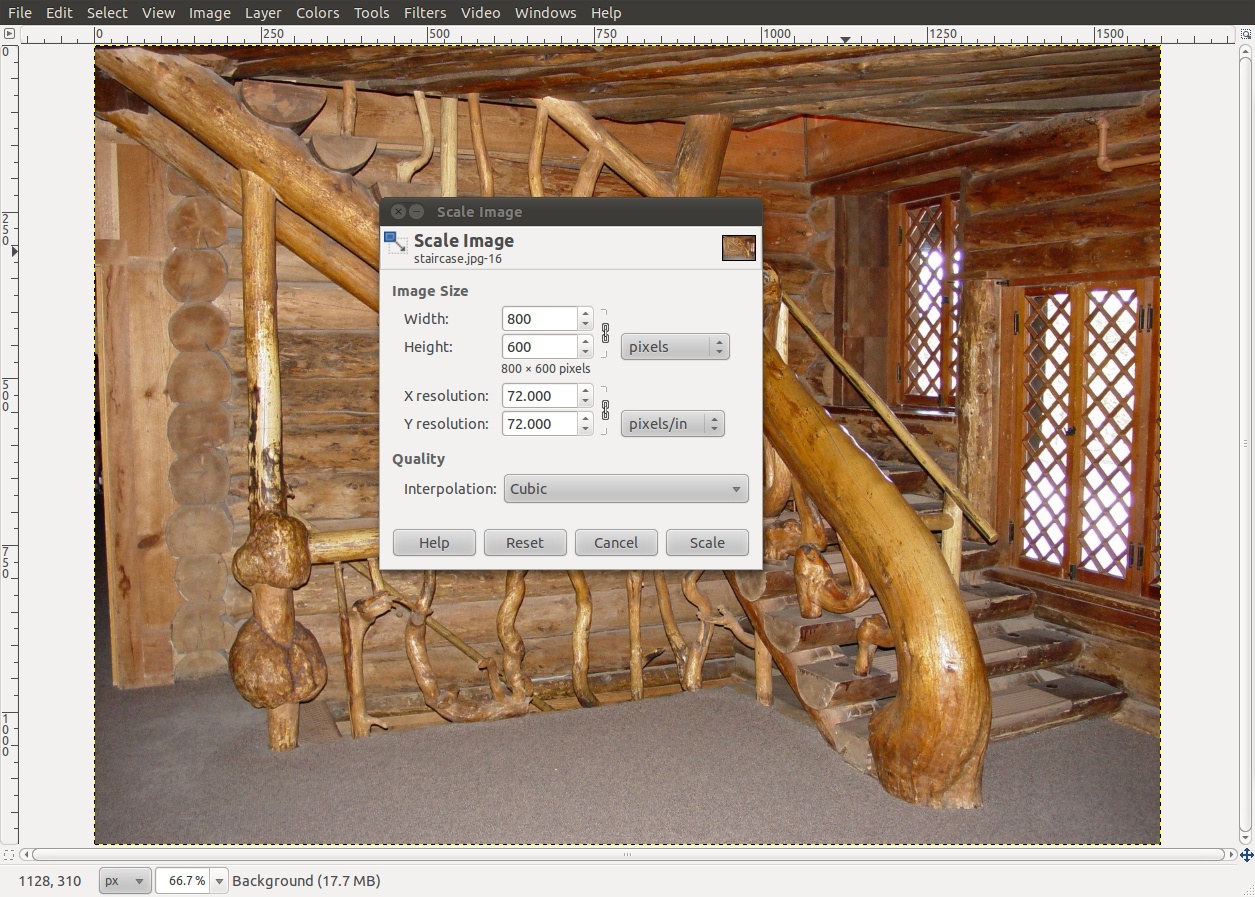
- Scale the image to the final size you want. This is different from the previous method. In the previous method, I had you scale the image up in size (in other words, make it larger). Forget that. This time, make it the size you'll want on your web page. In this case, I'm going to make it 800x600. Select Image -> Scale Image. Choose your image size, then click "Scale". Note that, if you're like me, the image may appear small on the screen. I have a large monitor. To make the image fill up the Gimp image window, click Shift + Ctrl + E simultaneously.
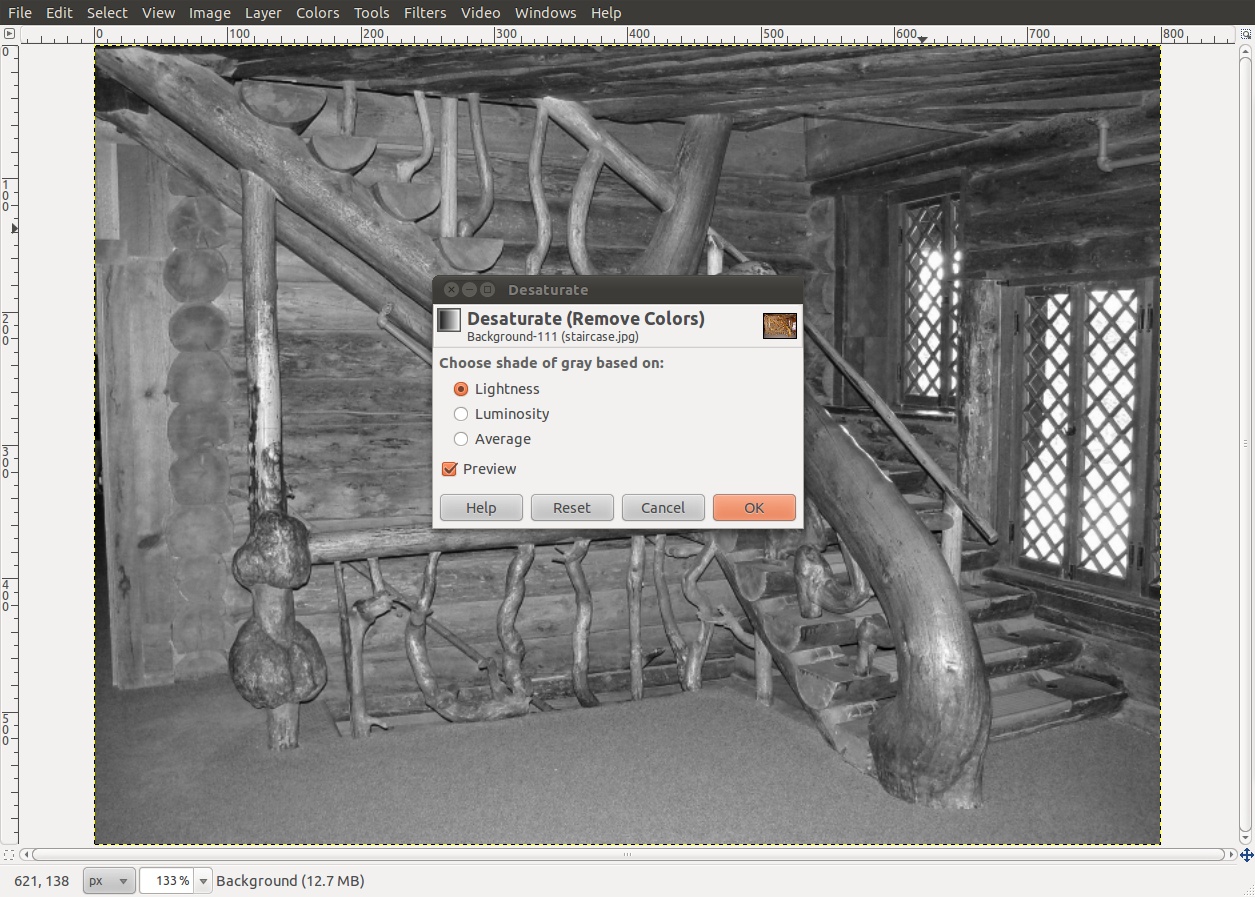
- Convert the image to black and white. In Gimp, you do this by selecting Color -> Desaturate. The pop-up window gives you the choice of choosing the images lightness, luminosity, or average. Personally, I choose lightness (luminosity is just a bit too washed out for my taste), but use whatever you want.
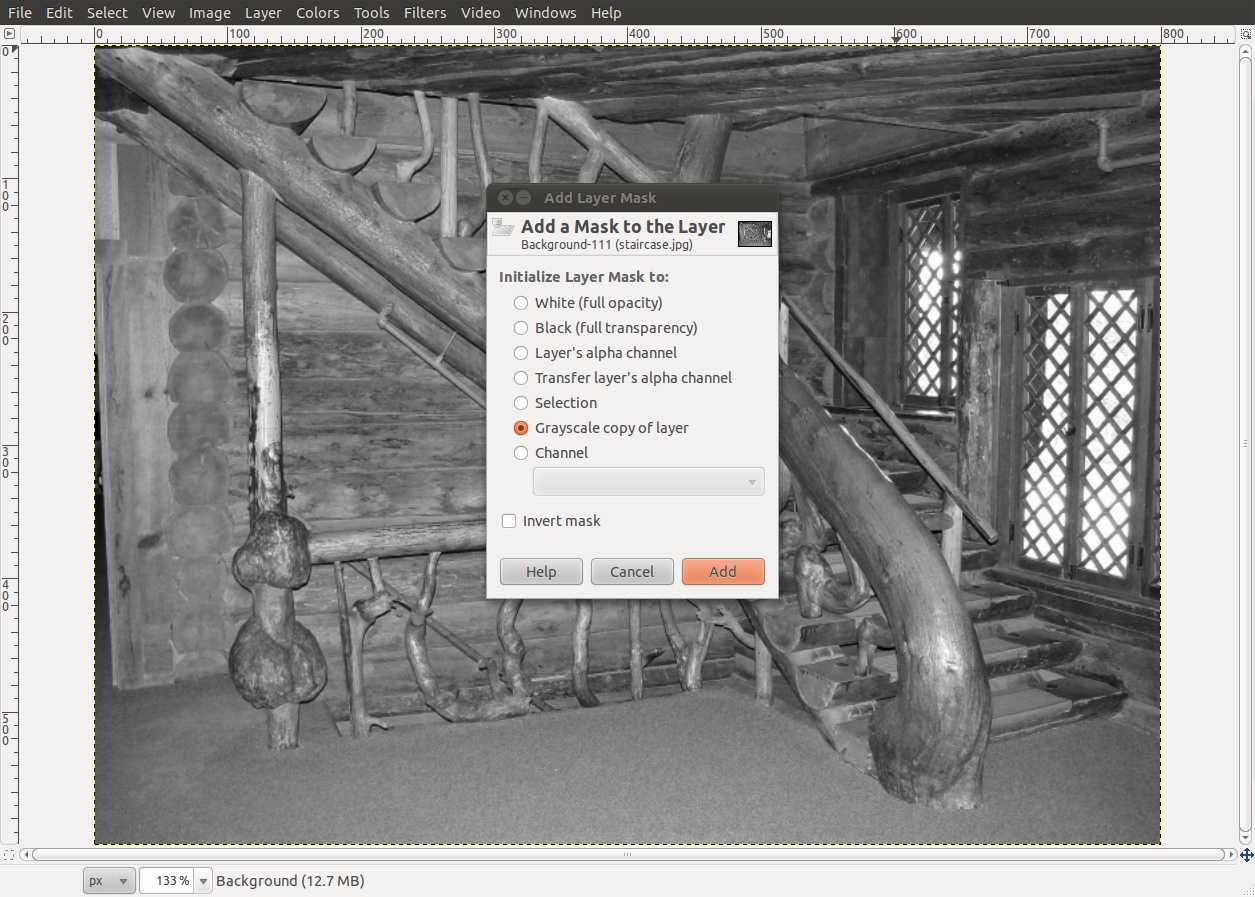
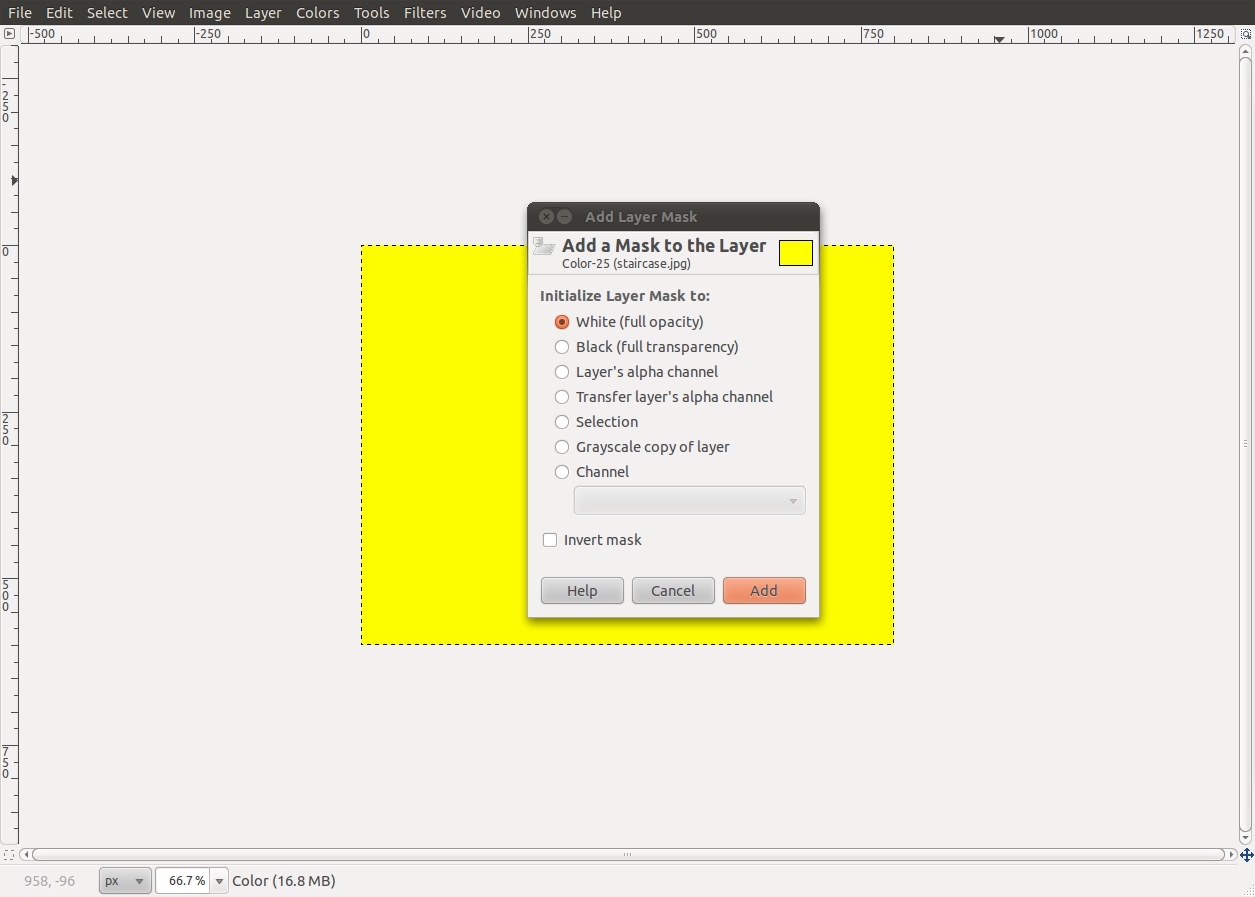
- Create a transparency layer. Select Layer -> Mask -> Add Layer Mask, then select "Grayscale copy of layer" and click "Add". This will create the alpha layer that you will eventually lay over the (soon to be created) solid color layer.
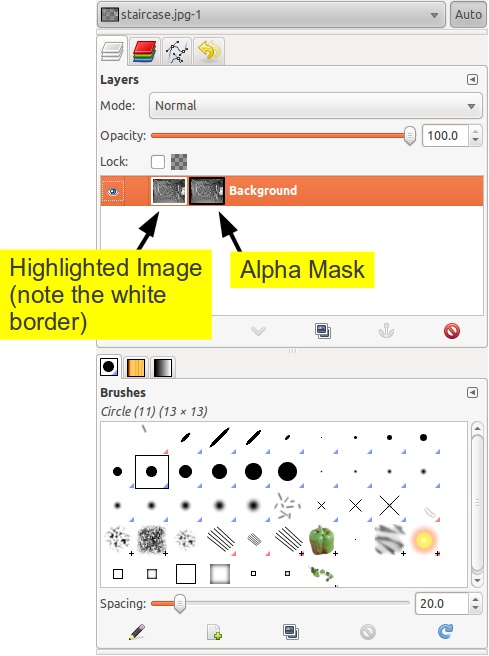
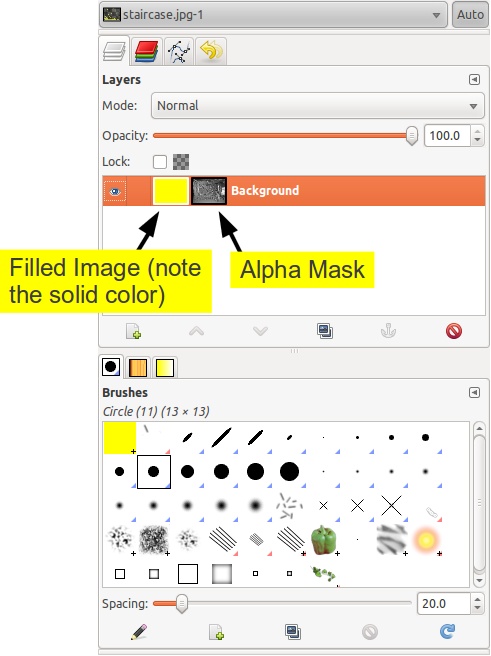
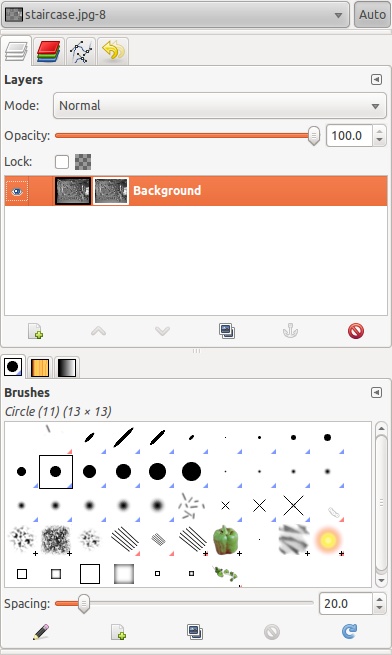
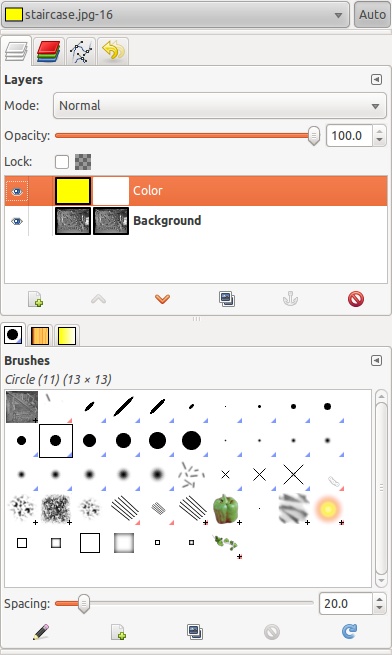
- Highlight the image in the "Layers, Channels, Paths, Undo" window. In the "Layers, Channels, Paths, Undo" window, you should now see two thumbnails of your image. The one on the left is the actual image; the one on the right is the alpha layer mask. When you created the layer mask in the previous step, it became the active part. You want the image itself to be the active part. To do so, click on the image to the left so that it is highlighted. You can tell its the highlighted one by the white border around it.
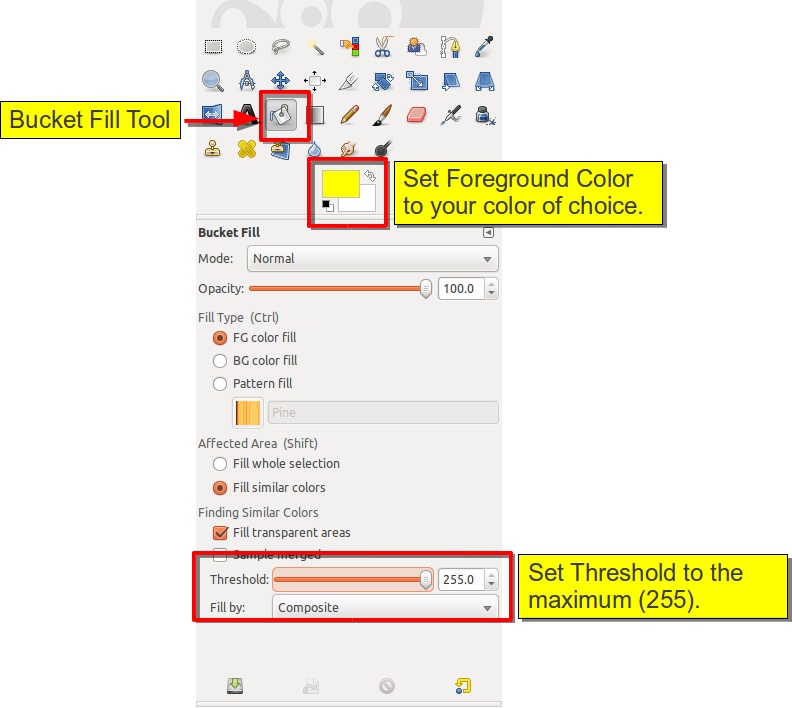
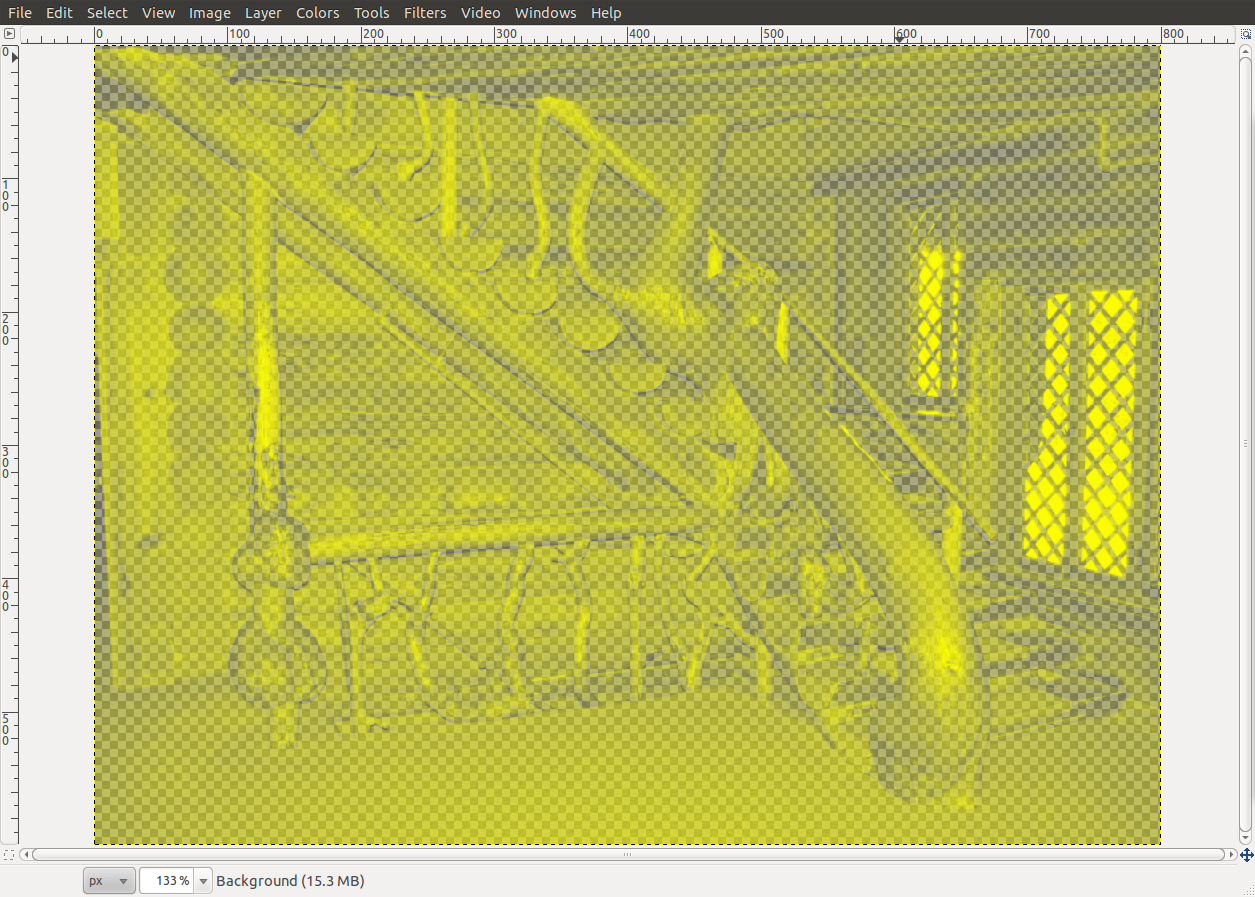
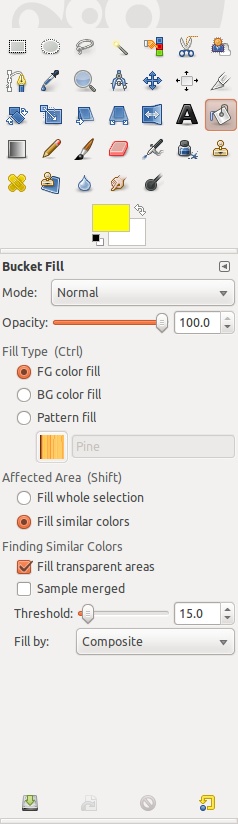
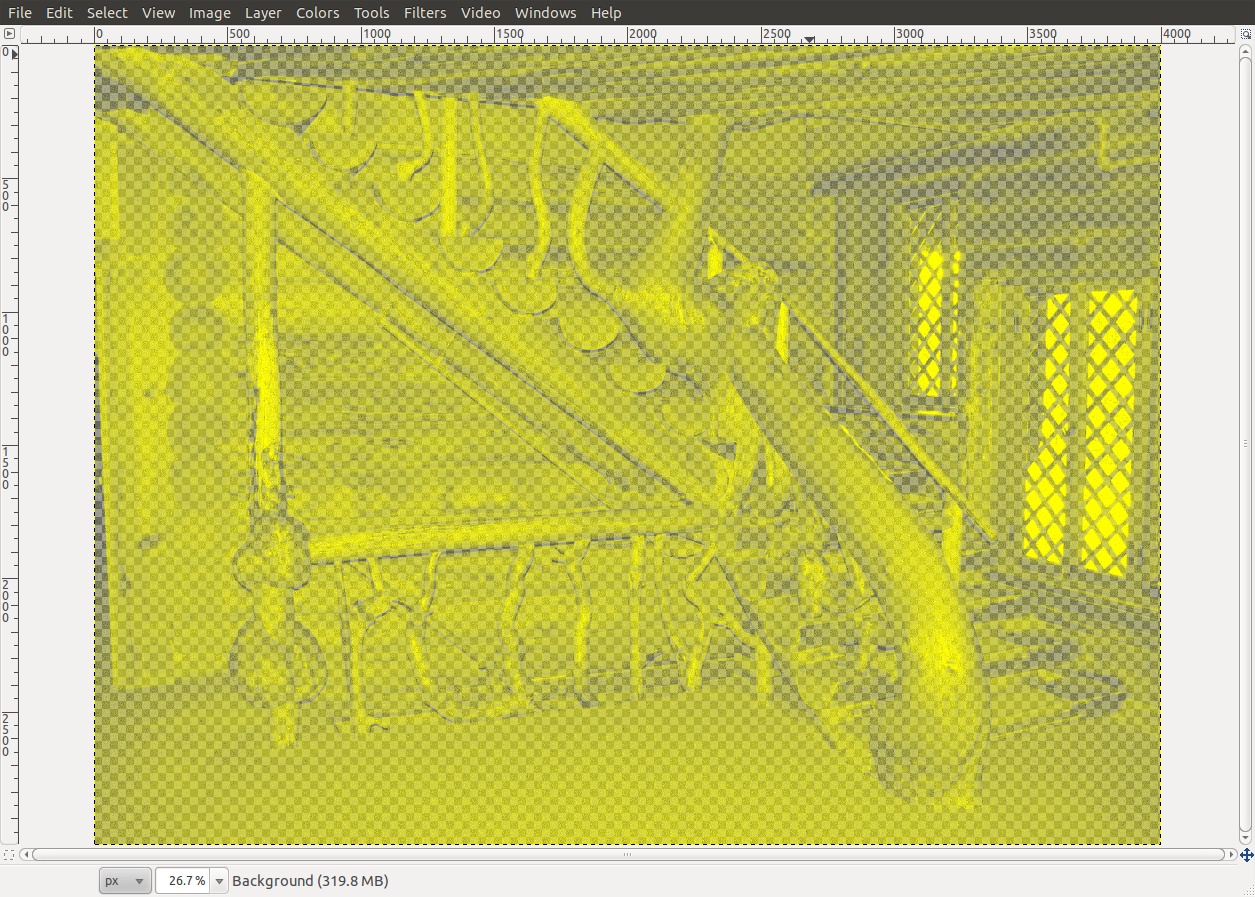
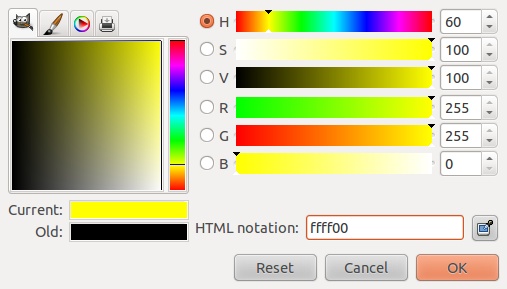
- Color the image layer with your desired color. In this example, I'm using yellow (hex code = ffff00). Set the foreground color to your desired color, then select the "Bucket Fill Tool". Here's the subtle change. In the "Toolbox" window, there is a slider bar for "Threshold". Slide it all the way to the right so that it has a value of 255. Then left-click anywhere in the image. You should now have a layer of solid color of whatever you chose. The image itself will appear as the color overlaid with the transparency.
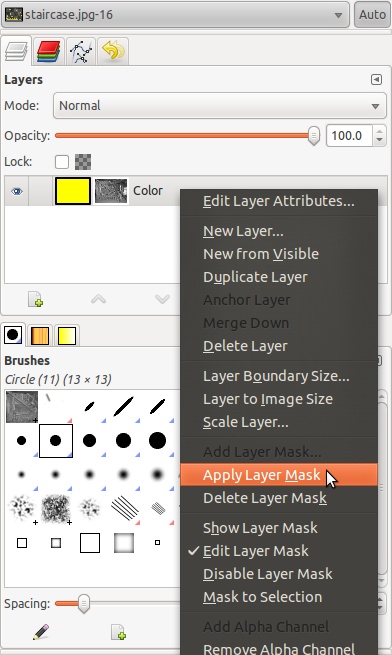
- Apply the layer mask to the colored layer. You should now have your final image.
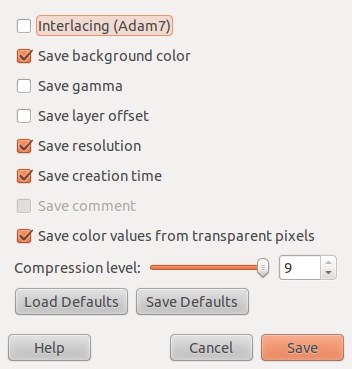
- Save your image in the PNG format. Select File -> Save As.... In the pop-up window, enter the new filename in the "Name:" window, put the ".png" extension on the end, then click "Save". You will be provided a window with several options. The important ones to have checked are "Save background color", "Save resolution", "Save color values from transparent pixels", and "Compression level".
That's it. You've now created an image that can serve as a hidden background for your website. If you so desire, you can use this script to test out your image.
The Hidden Background: A New Method
Gary Schafer, 9 April 2012
I no sooner posted my previous post on how to create a hidden background image when I stumbled across a (perhaps) better way to create the image. If you've created a background image using my previous technique, go ahead and open it with Gimp. Now, select the "Color Picker Tool" (the one that looks like an eye dropper), then in the toolbox, select "Pick only" and "Use info window (Shift)". Now click on different parts of the image you created. Do you notice something interesting? Here's what I noticed. The image is one color, but it's opacity is varied due to the presence of the alpha channel. The alpha channel is what determines the opacity or transparency of the image. Again, PNG (portable network graphics) images preserve the alpha channel; JPG format images do not. Hence, the reason you have to use the PNG format for hidden images.
I began wondering if I could just use the alpha channel from the image and transfer it to a layer of the color I wanted. For example, for the previous post, I used yellow to color the image. Was it possible to create a transparency of the image, then transfer that transparency to a layer of solid yellow and achieve the same affect? In short, the answer is "Yes". I will walk you through it step-by-step because, friends, it wasn't easy figuring it out. I've also included screenshots to make it easier for you to perform these steps yourself. Here we go.
- Open the image you want to use. Again, I'm going to use the staircase image taken in the Old Faithful Inn in Yellowstone Park.
- Scale the image to the final size you want. This is different from the previous method. In the previous method, I had you scale the image up in size (in other words, make it larger). Forget that. This time, make it the size you'll want on your web page. In this case, I'm going to make it 800x600. Select Image -> Scale Image. Choose your image size, then click "Scale". Note that, if you're like me, the image may appear small on the screen. I have a large monitor. To make the image fill up the Gimp image window, click Shift + Ctrl + E simultaneously.
- Convert the image to black and white. In Gimp, you do this by selecting Color -> Desaturate. The pop-up window gives you the choice of choosing the images lightness, luminosity, or average. Personally, I choose lightness (luminosity is just a bit too washed out for my taste), but use whatever you want.
- Create a transparency layer. Select Layer -> Mask -> Add Layer Mask, then select "Grayscale copy of layer" and click "Add". This will create the alpha layer that you will eventually transfer to a (soon to be added) solid color layer.
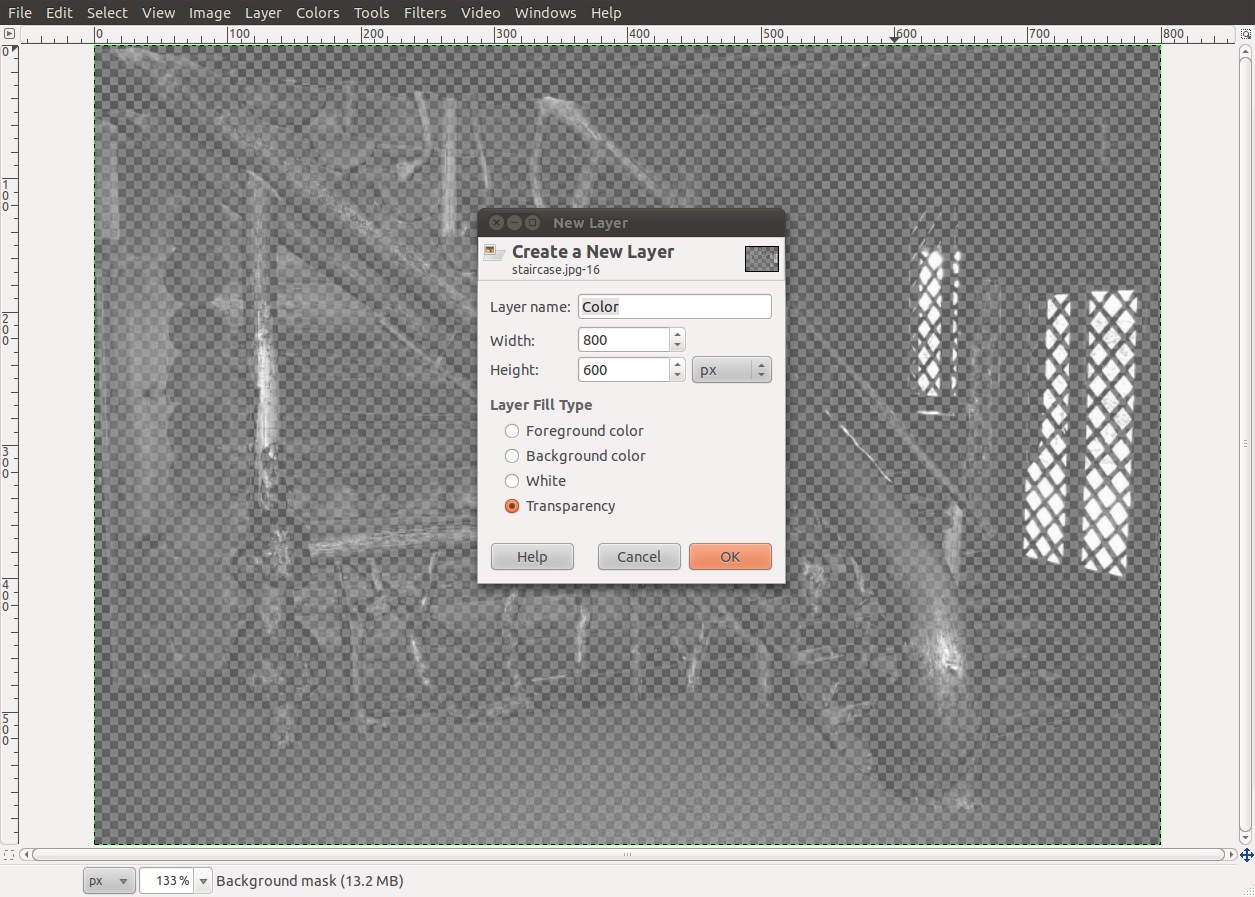
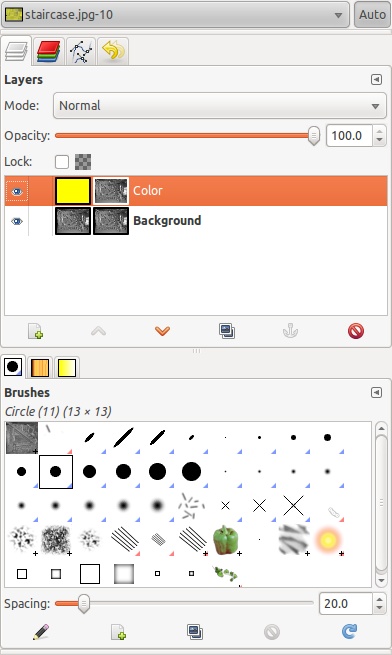
- Create a new layer for your color layer. Select Layer -> New Layer. In the pop-up window, give it a name (I just called mine "Color"), select "Transparency" from the list of "Layer Fill Type"s, then click "OK".
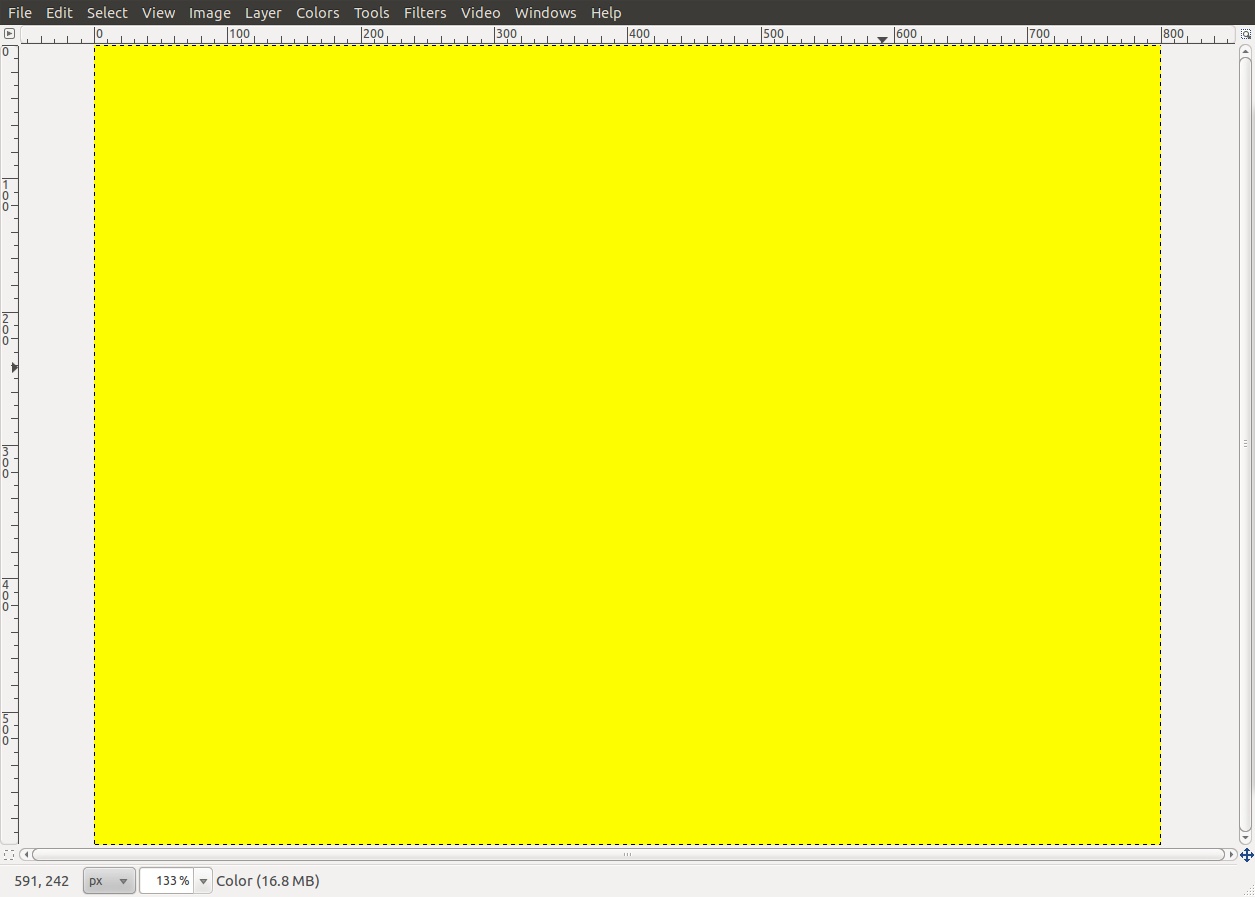
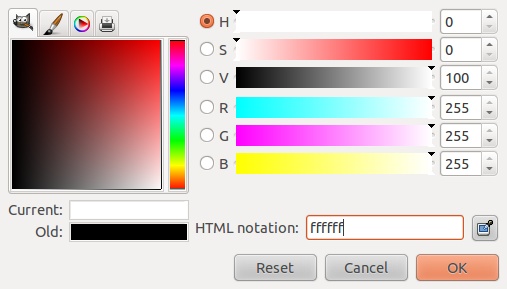
- Color the new layer with your desired color. In this example, I'm using yellow (hex code = ffff00). Set the foreground color to your desired color, then select the "Bucket Fill Tool". Then left-click anywhere in the image. You should now have a layer of solid color of whatever you chose.
- Add a layer mask to the colored layer. Select Layer -> Mask -> Add Layer Mask. In the pop-up window, select "White (full opacity)" and click "Add".
- Copy the transparency layer of the image. In the "Layers, Channels, Paths, Undo" window, click on the original image layer so that it is highlighted. Then in the image window, select Edit -> Copy. Or once you've highlighted the layer in the "Layers, Channels, Paths, Undo" window, you can press Ctrl + C keys simultaneously.
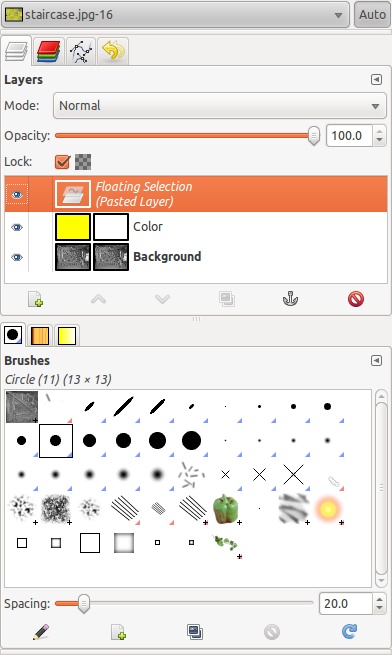
- Paste the transparency to the colored layer. In the "Layers, Channels, Paths, Undo" window, click on the colored layer so that it is highlighted. Then select Edit -> Paste. (Or you can also highlight the layer, then press Ctrl + V keys simultaneously.) You should now have a floating selection layer above your colored layer. Note that it is important that the appropriate layer is selected when copying and pasting. You want to copy from the image layer and paste to the colored layer.
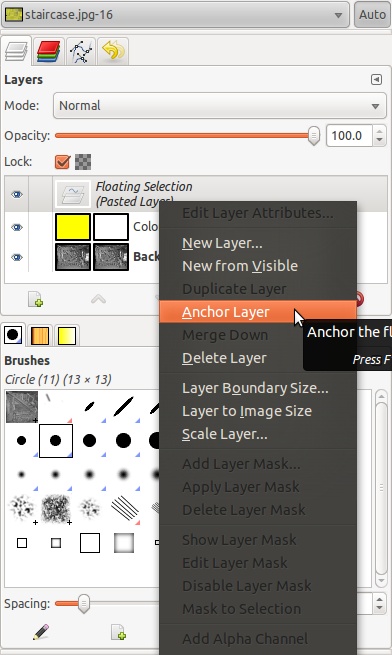
- Anchor the layer to colored layer. Select Layer -> Anchor Layer. The colored layer should now have the same alpha channel (transparency layer) as the original image.
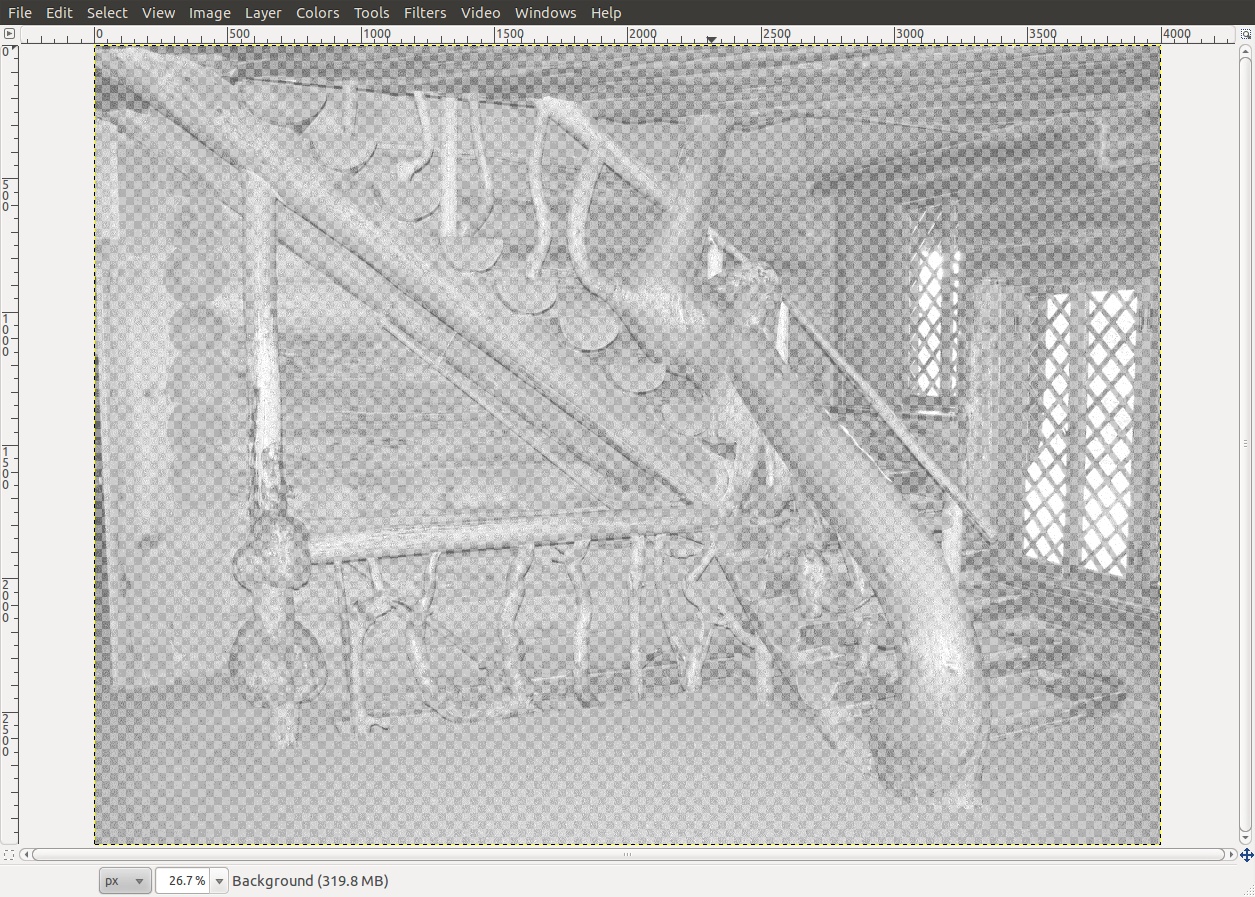
- Apply the layer mask to the colored layer. You should now have your image in the top layer.
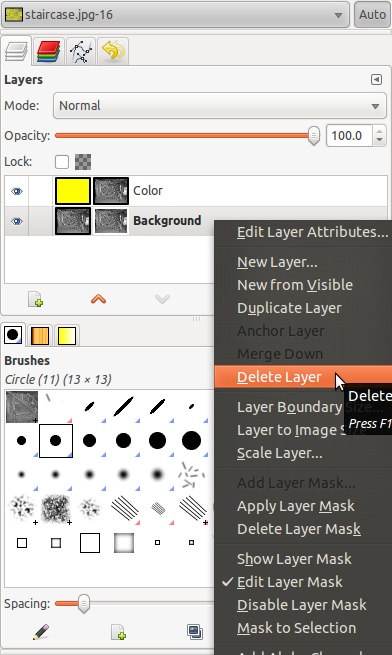
- Delete your original image layer. In the "Layers, Channels, Paths, Undo" window, click on the original image layer so that it is highlighted. Then select Layer -> Delete Layer.
- Save your image in the PNG format. Select File -> Save As.... In the pop-up window, enter the new filename in the "Name:" window, put the ".png" extension on the end, then click "Save".
That's it. You've now created an image that can serve as a hidden background for your website.
The Hidden Background: Expanded and Explained
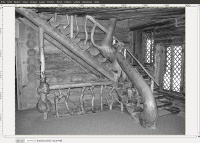
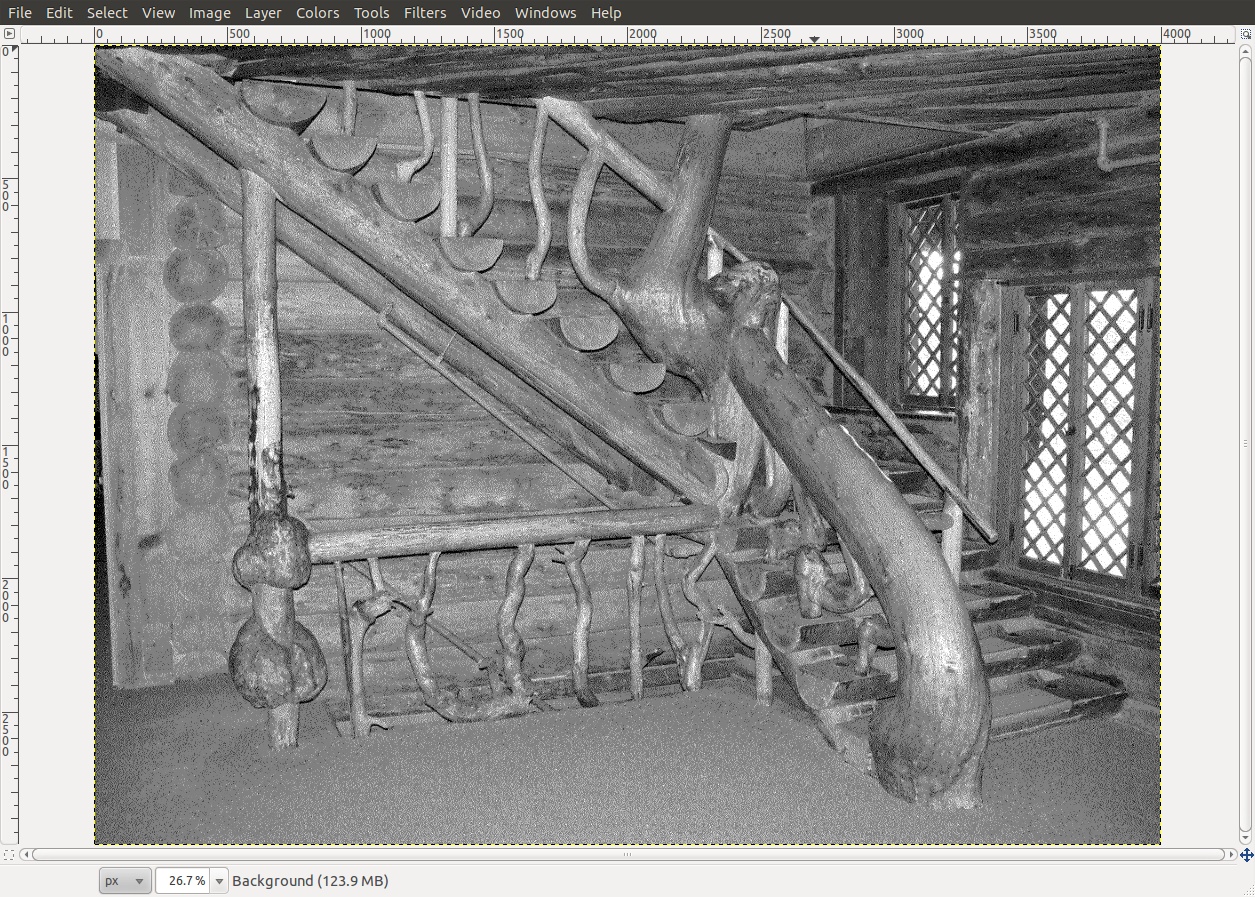
 This is the original image. You can either use this, or one of your own choosing. This is the original image. You can either use this, or one of your own choosing. |
 Step #1) Open the image. This is how the original image appears when first opened in Gimp. Step #1) Open the image. This is how the original image appears when first opened in Gimp. |
 Step #2) Resize the image so that the smallest dimension is at least 3000 pixels. Step #2) Resize the image so that the smallest dimension is at least 3000 pixels. |
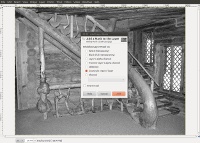
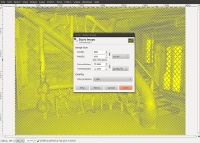
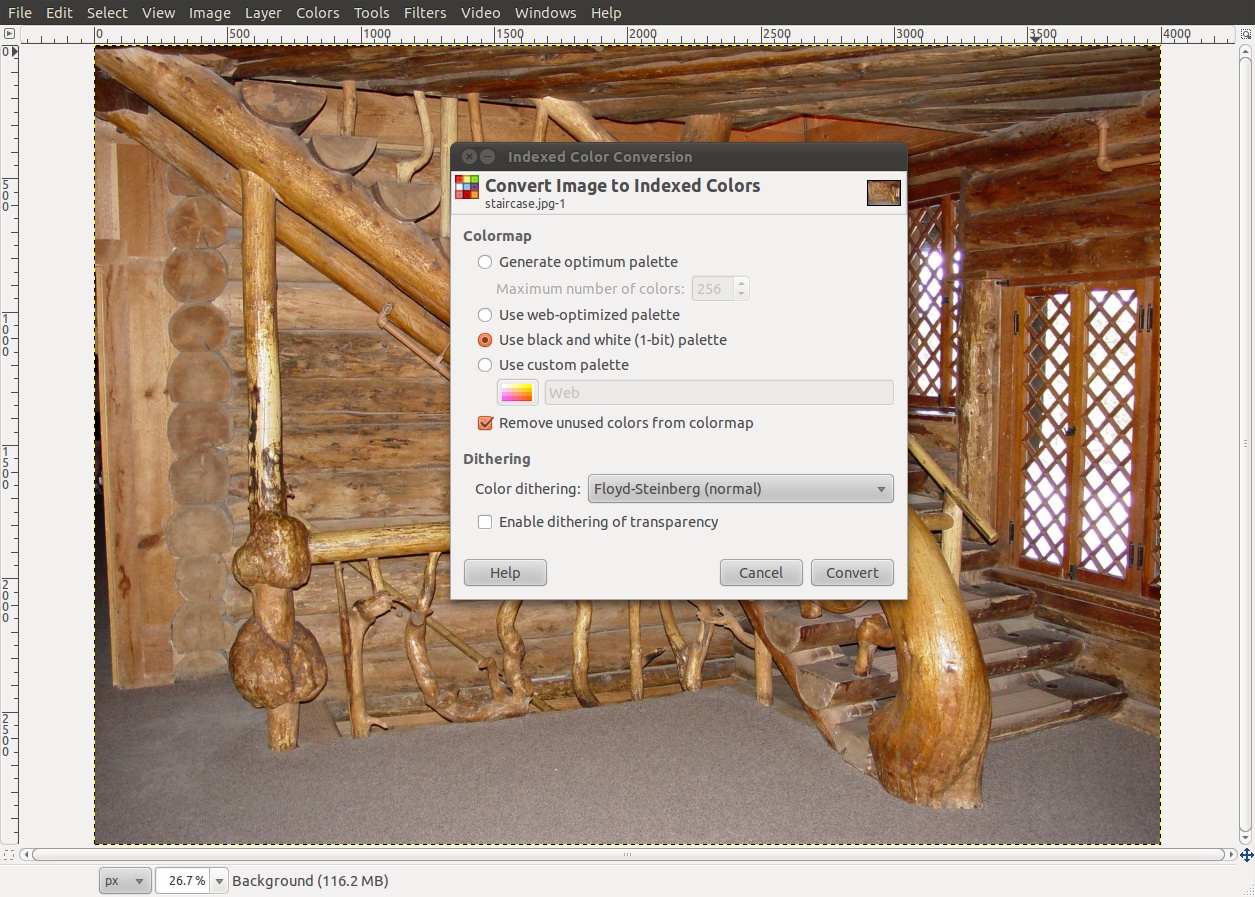
 Step #3) Convert the image to a 1-bit indexed image using the Floyd-Steinberg (normal) color dithering. Step #3) Convert the image to a 1-bit indexed image using the Floyd-Steinberg (normal) color dithering. |
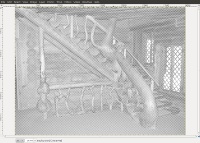
 This is how the image will appear once is has been converted to a 1-bit indexed image using Floyd-Steinberg (normal) color dithering. This is how the image will appear once is has been converted to a 1-bit indexed image using Floyd-Steinberg (normal) color dithering. |
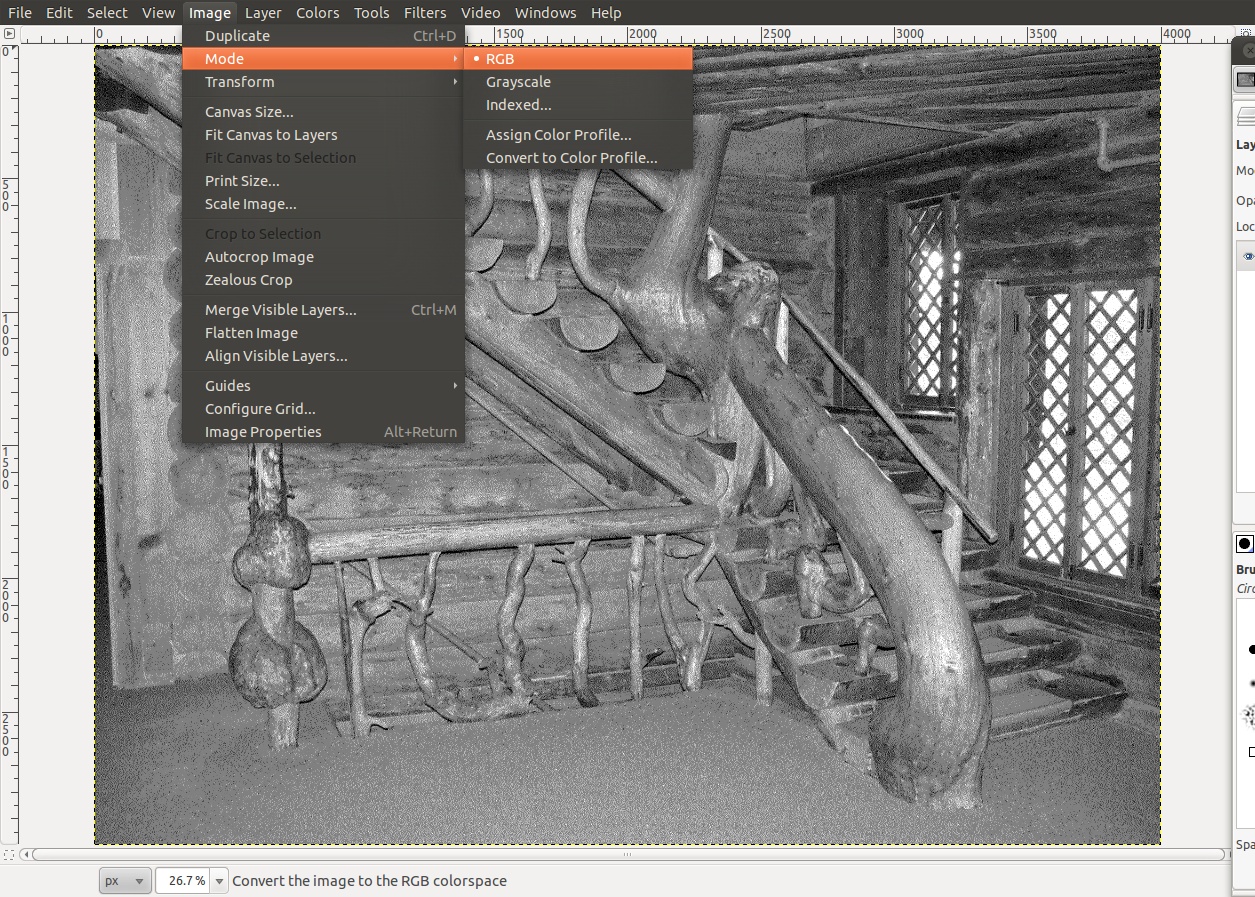
 Step #4) Convert the image from an indexed to an RGB. Step #4) Convert the image from an indexed to an RGB. |
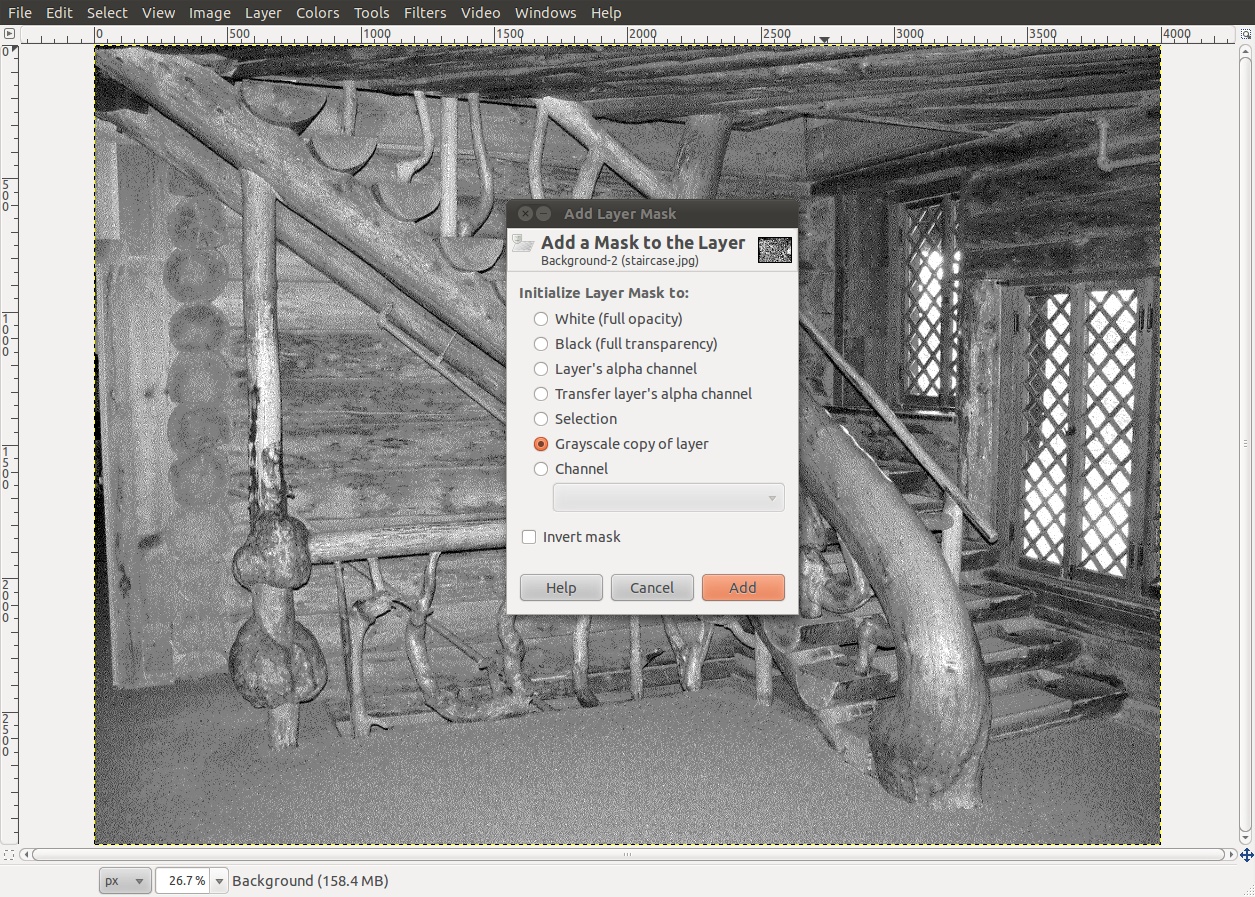
 Step #5) Create a grayscale transparency mask layer. Step #5) Create a grayscale transparency mask layer. |
 Step #6) Apply the transparency mask to the image. Step #6) Apply the transparency mask to the image. |
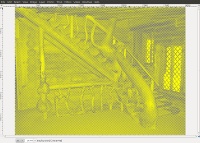 Step #7) Using the "Color Exchange", change the white color to yellow. Step #7) Using the "Color Exchange", change the white color to yellow. |
 Step #8) Scale the image, in this case down to a height of 600 pixels. Step #8) Scale the image, in this case down to a height of 600 pixels. |
Gary Schafer, 8 April 2012
This is an expanded version of my previous post. Here, I'll cover each step as well as provide a basic web page to allow you to make changes yourself.
For this demonstration, I've selected a picture I took while staying in the Old Faithful Inn in Yellowstone National Park. This particular picture shows a staircase. We're going to use it to demonstrate the hidden background image. We'll go through each step again, only this time with a bit more detail (and screenshots).
- Start by opening the image. I'm using Gimp for all of the image processing.
- Resize the image. (Image -> Scale Image). I recommend making the size of the smallest dimension at least 3000 pixels.
- Convert the image to a 1-bit, indexed image using Floyd-Steinberg (normal) dithering. (Image -> Mode -> Indexed) Select "Use black and white (1-bit) palette" and "Floyd-Steinberg (normal)" under "Color dithering:", then press "Convert". Once the image is converted, it will appear as a black and white image.
- Convert the image to RGB. (Image -> Mode -> RGB)
- Create a grayscale transparency layer mask. (Layer -> Mask -> Add Layer Mask) Select "Grayscale copy of layer" and click "Add".
- Apply the transparency mask to the image. (Layer -> Mask -> Apply Layer Mask) This will leave you with an image that is white image with a transparency points where black pixels used to be. The effect of the dithering is that it appears as a grayscale.
- Convert the white in the image to your desired color. (Color -> Map -> Color exchange...) In this case, we're going to convert from white to yellow. Put the desired colors into the "From color" and "To color" bars, then press "OK".
- Rescale the image down to a smaller size. For this example, I used a height of 600 pixels.
The last step is to save the image in the PNG (portable network graphics) format. The PNG format preserves the transparency layer; the JPG format does not. Anyway, that's a quick and dirty tutorial on how to create the hidden image. For the next section, I'll explain how it becomes hidden.
The basic idea is to create two layers, one over top of the other. The top layer contains the hidden image. The bottom layer contains two different colored backgrounds. One of the background colors will be the same color as the (now changed) image. The other color will something different that will allow the image to be seen. The two backgrounds will be positioned such that, as the user scrolls down the screen, the image will appear.
To demonstrate this, here's a small script with which you can practice. This script creates a fixed-position, upper layer containing the image. Underneath that is a two-colored, background layer. The upper part is the same color (in this case, yellow) as the image. The lower part of the layer is a different color (in this case, basic blue). The image shows up when the user scrolls down on the screen such that the second color is positioned behind the image. This makes use of the "z-index" property for a CSS container. Note that, in order for the z-index property to work, the container must use the "position" property (relative, fixed, absolute or static).
Note that, in order for the z-index property to work, the container must use the "position" property (relative, fixed, absolute or static).
If you want to use this script for your own image, you just have to make sure that (a) your image and this script are in the same folder and (b) the script has the correct filename in it. The current script is using the filename "hiddenBack.png". If you're new to HTML and CSS, you should understand that this file is nothing more than a text file. You can open it with any text editor such as Notepad (in Windows) or "text editor" (in Linux). Anyway, you can open the file with the text editor of your choice, then change the filename to one of your choosing.
The one part that I did not cover for this basic introduction was the fading of the edges. I'll cover that in a future posting.
Hope this works out for you. Enjoy!
How to Make a Hidden Background
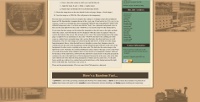 The bottom images as they appear before the dark brown has scrolled onscreen. The bottom images as they appear before the dark brown has scrolled onscreen. |
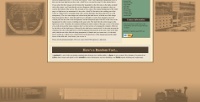 The bottom images as they appear as the dark brown is being faded in. The bottom images as they appear as the dark brown is being faded in. |
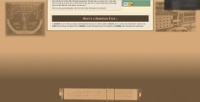 The bottom image that only shows the center image; the outer two images have now blended in with the dark brown background and, hence, are invisible. The bottom image that only shows the center image; the outer two images have now blended in with the dark brown background and, hence, are invisible. |
Gary Schafer, 4 April 2012
If you've looked at this site, you may have noticed the background images. If you scroll all the way down, you may notice that the bottom two images disappear, but another image (as of this writing, a slide rule) appears in the center of the screen. I got the idea when I visited the Thinkgeek website. If you scroll that webpage all the way to the bottom, the spaceships and robots get replaced by the zombies. It's a neat trick based on a portable network graphic (PNG) image. Those images use a combination of two colors along with a transparency layer in the PNG plus some cascading style sheets (CSS) to create this effect.
I do not have Thinkgeek's graphic abilities. So instead of something hand-made, I'm using my own images. They use only one color plus the transparency layer of the PNG to allow them to become invisible.
Here's how I make them. NOTE: This tutorial uses Gimp, which has been my graphics program for several years now.
- Open the image.
- Scale the image to a large size (at least 3000 pixels in the smallest dimension). (Image -> Scale Image) The purpose of scaling to a large size is due to the use of the Floyd-Steinberg dithering in the next step. If the image is small, then the dithering will create serious artifacts and make the image look distorted.
- Create a black-&-white, 1-bit per pixel representation of the image. To do this, change the mode of the image to "indexed". (Mode -> Index -> Use black-&-white (1-bit) palette with Floyd-Steinberg (normal) dithering.)
- Change the mode back to RGB. (Mode -> RGB)
- Create a layer mask. (Layer -> Mask -> Add layer mask. Select "Use grayscale copy of layer.")
- Apply the layer mask. (Layer -> Mask -> Apply layer mask.)
- Change the color of the white pixels. (Colors -> Map -> Color exchange. Use white (hex = ffffff) as the "From color" and the desired color (In my case, it was light brown, hex code = d4a879) as the "To color".)
- Fade the edges. NOTE: This step is not necessary. I simply do it in order to make it blend better into the background.
- Apply a layer mask. (Layer -> Mask -> Add layer mask.)
- Select "White (full opacity)".
- Under the colors, select a pure white (hex code = ffffff) foreground color and pure black (hex code = 000000) background color.
- Select the blend tool. (Tools -> Paint tools -> Blend. Choose the "FG to BG (RGB)" for "Gradient".)
- Draw a line at the corner in which you want the fade out.
- Apply the mask. (Layer -> Mask -> Apply mask.)
- Repeat steps (a) through (f) for each faded edge desired.
- Resize the image down to the size desired for the web page. (Image -> Scale image.)
- Save the image as a .PNG file. This will preserve the transparency.
The next step is a bit more involved. It requires the coding of a webpage using CSS and different layers in CSS. Specifically, it requires the use of the z-index tag. If you look at the CSS code for this webpage, you'll see several IDs (the classes beginning with the # sign) with different z-indexes and different background colors. You'll also note that the "body" has a particular background color, in this case the same light brown (hex code = d4a879) as was used for step #7 in the tutorial above.
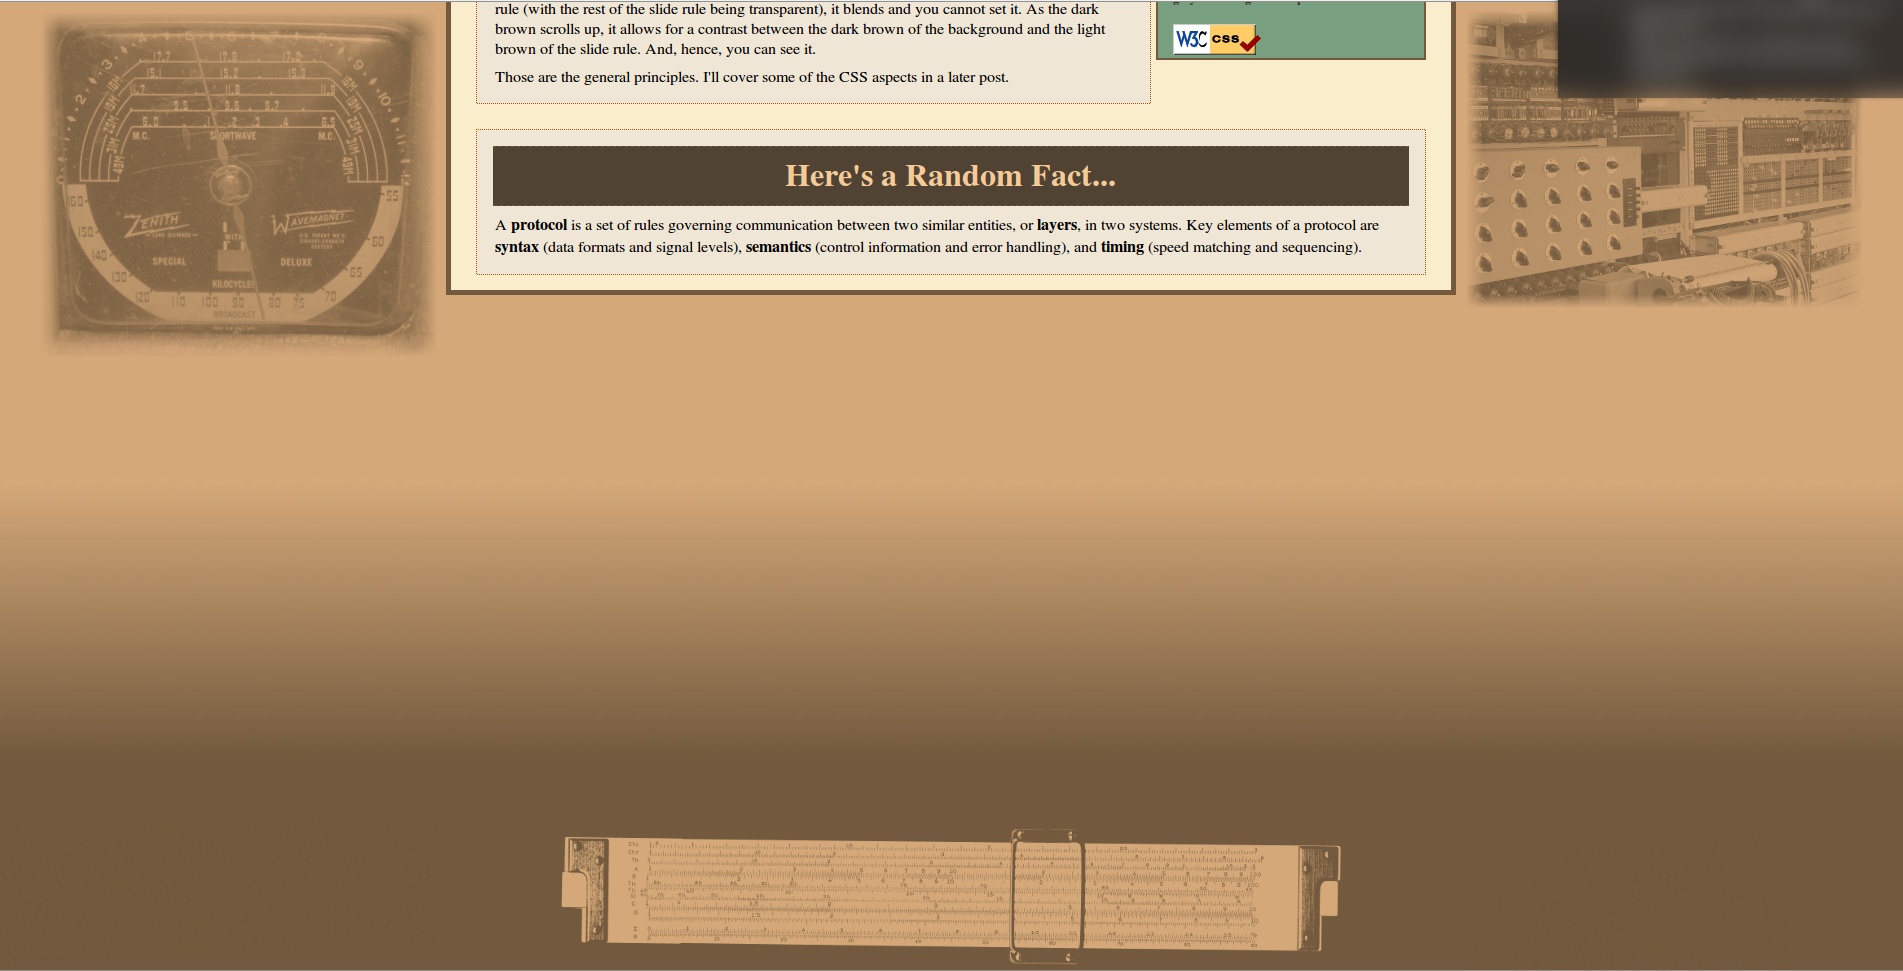
If you notice the three images on the bottom (the transmitter on the left, train on the right, and slide rule in the center), you'll note that the out two disappear while the center one appears when you scroll to the bottom of the screen. This is based on two colors. The normal background of the entire page is a light brown (as mentioned, it's hex code = d4a879). But tied to the scrolling part of the screen is a darker brown rectangle along with a section that fades from that dark brown to a full transparency. The two outer images are colored using the dark brown, with the rest of the image being transparent. Hence, when the dark brown is brought on screen, they disappear since the colored parts are the same as the background, and the transparent parts will take on the color of the background. In other words, everything is the same color. The slide rule (the center image) is the light brown color. Normally, the container holding the actual content of the page covers it. But when you scroll down past the main container, there's a short section of a transparent container, followed by the fade in of the dark brown, followed by the dark brown section itself. At the point just past the container, the color is the light brown of the background. Because this is the same color as the slide rule (with the rest of the slide rule being transparent), it blends and you cannot see it. As the dark brown scrolls up, it allows for a contrast between the dark brown of the background and the light brown of the slide rule. And, hence, you can see it.
Those are the general principles. I'll cover some of the CSS aspects in a later post.


