
October 2008 Archives
How to Perform an FCC ID Search
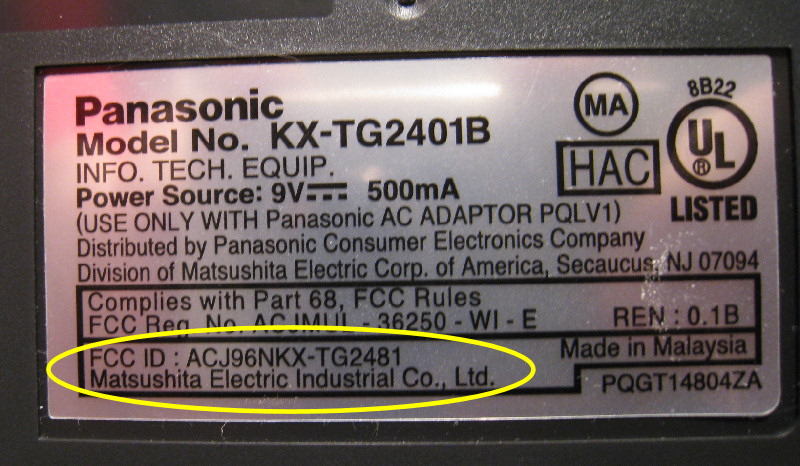 Image showing the FCC ID on the bottom of my Panasonic cordless telephone |
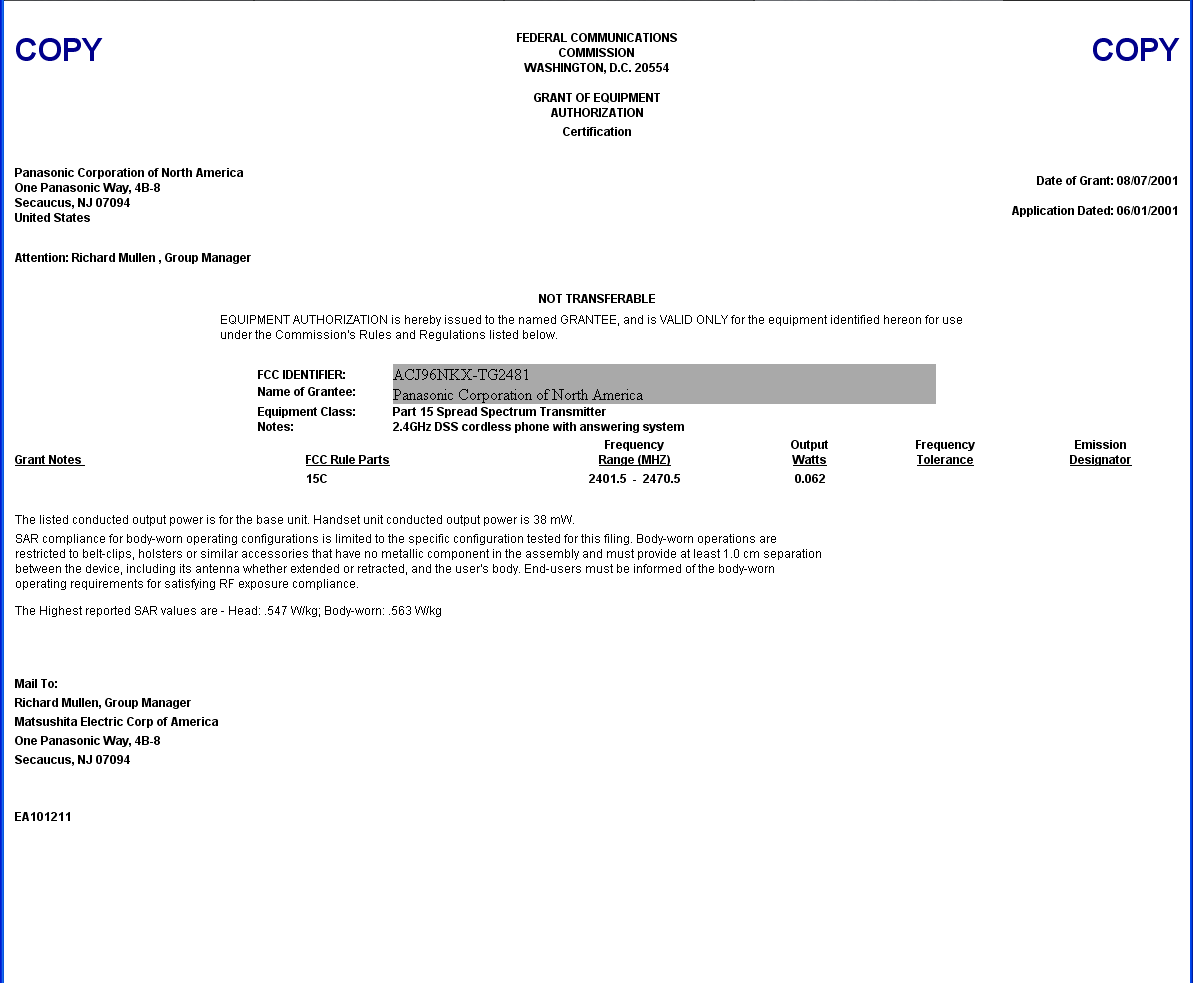
More than likely, you have not just one, but several wireless devices either on you, or nearby. Being a geek, I like to know more about such devices than most people. For example, one thing that I really like to know is what frequency it uses. Typically, these frequencies are mandated by the FCC (whether for good or bad is for a different discussion). The nice thing is that the FCC allows anyone to search an FCC ID on their web site.
To find out what frequency your device is using, look for an FCC ID. It will literally say "FCC ID" or "FCCID" or something similar. At left is a picture showing the FCC ID on my Panasonic cordless phone. It's a 2.4 GHz digital cordless. And I'll use it to show you how to look up the FCC ID.
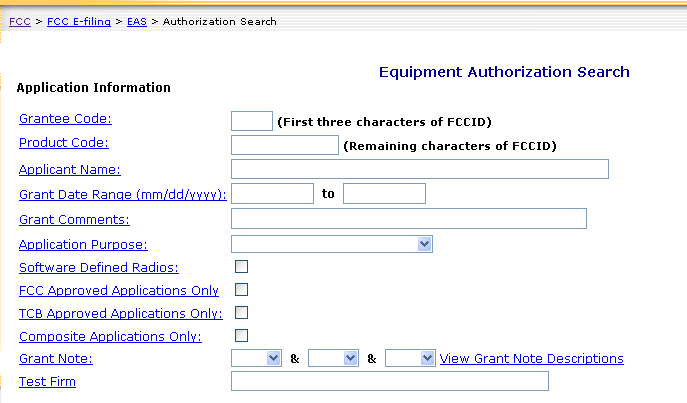
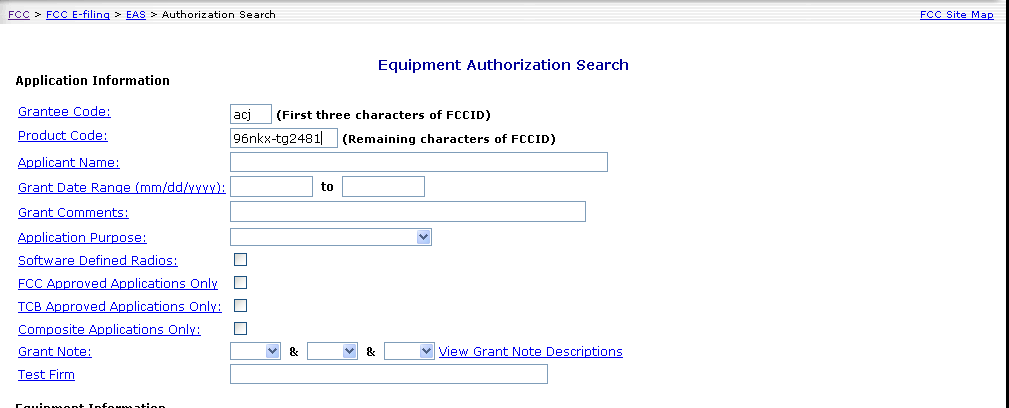
Start by going to the FCC ID search site. There, you will find a page that gives you several fields to fill in. It's the first two fields that are important. Look at the FCC ID of my Panasonic phone. The first three digits, "ACJ", are the "Grantee Code". In this case, that means "Panasonic". All of the rest of the digits are the "Product Code". In this case, that means that all of the rest of the digits pertain just to this particular model of phone. It's not a serial number. In other words, any Panasonic model KX-TG2401B phone will have this same FCC ID on it. When I enter all of the information from my phone into the search fields, it looks like this. Down at the bottom of the web page is a button labelled, "Start Search". Push the button. In a few moments (which may be a couple of minutes, depending on the volume of traffic, I'm guessing), you should get a page with the results. Note: If I wanted to, I could leave the "Product Code" field empty and just do a search on the "Grantee Code". That would give me every authorization for Panasonic that is on the books at the FCC.
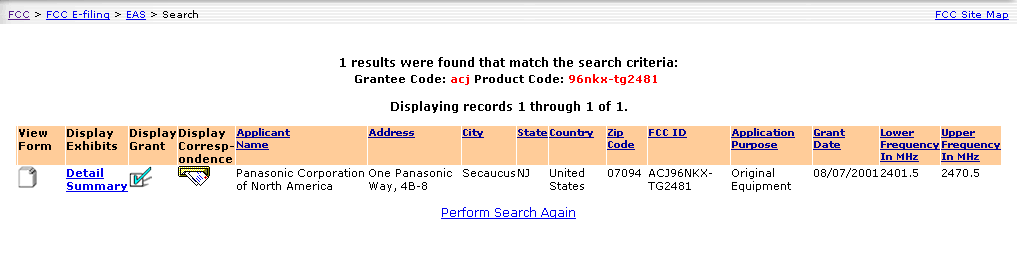
On the left of the page are a couple of links called "Details", "Summary" and one that looks like a little box with a checkmark in it. That is under a column labelled "Display Grant". Go ahead and click on the box with a checkmark in it. That opens a page that shows you a copy of the certificate of authorization of the equipment. It also provides some basic information on the phone, namely the frequency or frequency range it operates on and (in this case) the output power it uses.
Now go back to the "Search Results" page and click on the link for the "Details". The first thing that probably pops up is a warning box. Just click "Okay" (or whatever). It then displays a short list of different items stored on the FCC server about your particular device. Frankly, this is where the cool stuff resides. My favorite (being a geek and all) is the "Test Report". It will sometimes provide spectral plots of the signal, as well as actual pictures of the set-up showing how it was tested. Two words: Suh-WEEET!
Go ahead and do a search on something in your own home. Got a new RF remote control? How about your keyfob for your car that lets you unlock the doors from a distance? Your WiFi access point? Your cell phone? If you don't immediately see the FCC ID, you might look underneath the battery. That's normal for both cordless phones and cellular telephones.
Enjoy!
What's in my name?
If you've visited this site in the past few weeks, you may have remembered that it started as a different name. To wit, it was called "Muddled Musings". Before that, it was the "Rants n Raves" Page. Well, a quick Google search will tell you that there are lots of pages with the name Muddled Musings and Rants n Raves.
It was time for a new name. So, late one night, I was IMing with a friend. I asked him if he had suggestions for a new name, something original. His response was (and I quote), "Nothing comes to mind--will think about it. 2241 is not my most creative time."
To me, that was the epiphany. "2241". Just a freakin' number! Perfect! I mean, that's all a web page is, right? It's a number on the Internet. And talk about lack of creativity! This page couldn't be less creative if it tried. (And believe me, I'm trying. At times, very trying.)
Henceforth (and from now on), this page will be known as "2241".
And good night.
Setting the KEYTIME on an HP50g
Background
There is a review of the HP50g on Amazon.com that talks about the KEYTIME command. The reviewer, Dr. Stuart Gitlow, provided a fairly comprehensive review of the calculator. He started by talking about the initial inability to double-click quickly on the buttons. That made it difficult to rapidly enter numbers. When I received my HP50g, I had noticed the same thing. But I didn't realize that it was correctable. It is. Dr. Gitlow remarked of an undocumented KEYTIME command, but didn't provide any other details. Thanks to some hints provided in some other forums, I've been able to figure out how to change this parameter.
Setting the KEYTIME
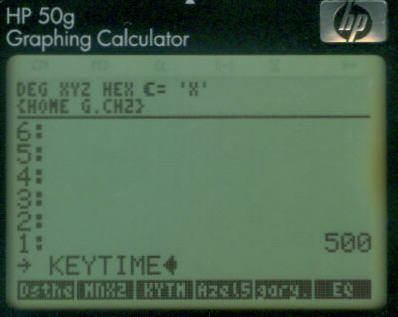 Start by entering ->KEYTIME (You will have to manually enter KEYTIME using the alpha keyboard, meaning (ALPHA) K E Y T I M E.) Note that the calculator puts a space between the right arrow and the KEYTIME term. |
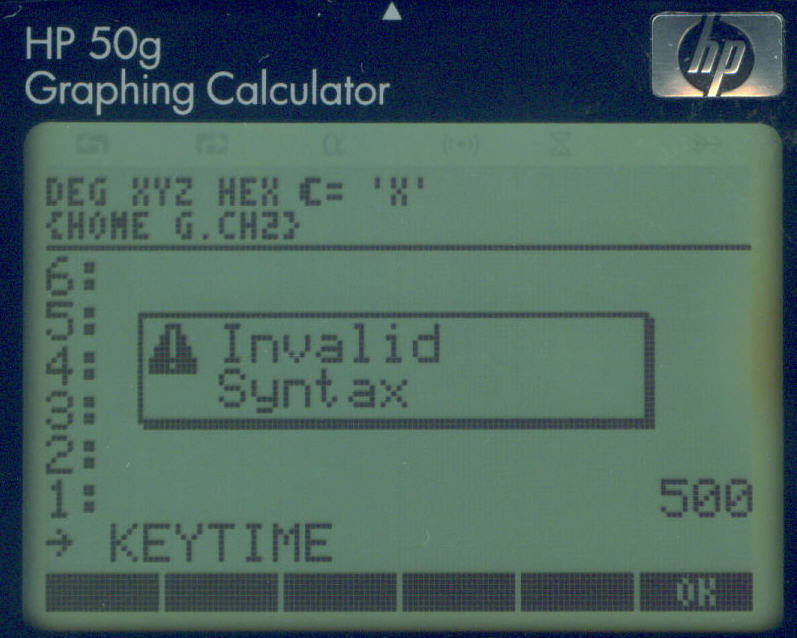 If you press ENTER at this point, you'll get the error shown above. That's because of the space between the right-arrow and the term KEYTIME. |
 Use the arrow keys and the backspace (<-) key to get rid of the space between the right-arrow and the term KEYTIME. Then press ENTER. This sets the KEYTIME for the keyboard. |
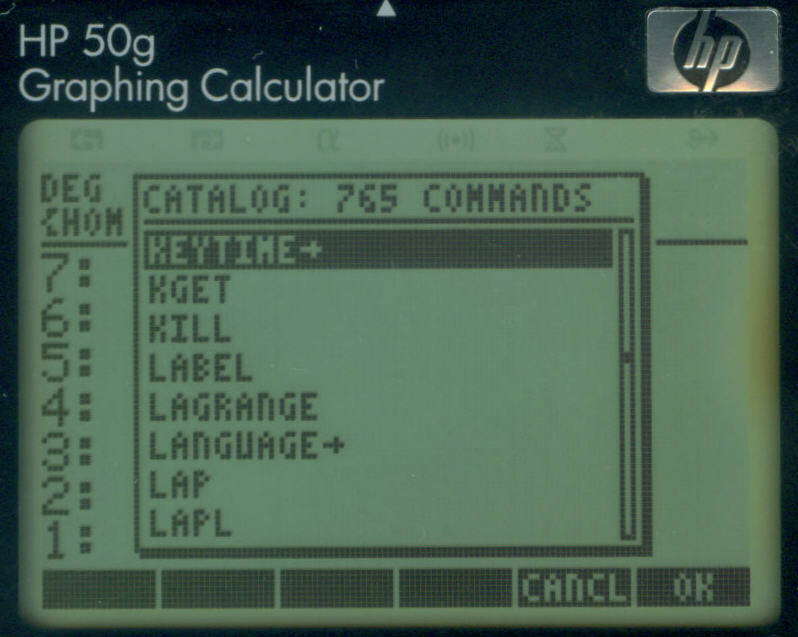 To check that the value entered properly, press [RIGHT-SHIFT] CAT (the SYMB key). This brings up the catalog of functions. Scroll to KEYTIME-> and press OK. |
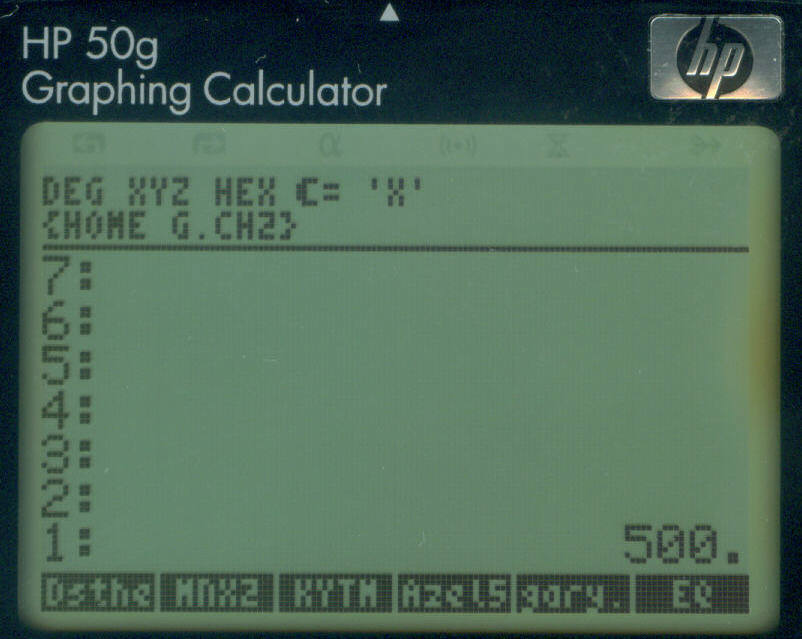 You should see the value you just entered. |
To set the KEYTIME on the HP50g, enter the relative delay allowed between keystrokes. The lower the number, the faster you can enter keystrokes. The initial value programmed into the HP50g is 1138. If you enter too low of a number, however, you could easily wind up with multiple numbers or characters from a single key click. The one that Dr. Gitlow suggested was 500. That's what I've used, too, and found that it works fine.
To enter 500 as your KEYTIME value, use the following keystrokes:
5 0 0 [ENTER]
[RIGHT-SHIFT] 0
[<-] The backspace key; this gets rid of the space between the right-arrow and the term KEYTIME.
[ALPHA] K E Y T I M E
[ENTER]
How to Test Your Remote Control: Method #2
Or How to Use That Old AM Radio For... Something
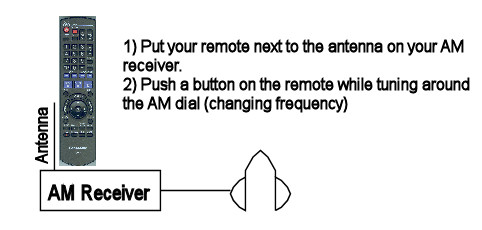
Here's an unexpected use for an AM radio that you probably never thought about. If you have a remote control and want to determine if it's working, this is a quick test. Turn the radio on and make sure it's set for "AM". Put the remote next to the antenna for the radio. Push a button on the remote and hold it down. As you do so, change the frequency on the radio. Eventually, you may end up hearing something that sounds like this.
What's going on? you ask. When you push a button on the remote, it's energizing and de-energizing circuits inside the remote. This creates sudden current flows that stop and start. It's this (relatively) large current flow that sets up a magnetic field. AM radios operate around 1 MHz, which makes them susceptible to low frequency disturbances such as from the remote. Note: It's because of AM's low frequency, around 1 MHz, as much as the fact that it is amplitude modulation that makes it more susceptible to interference from nearby lightning strikes.
How to Test Your Remote Controls
Or How I Captured The Image of the HP50g IR Port
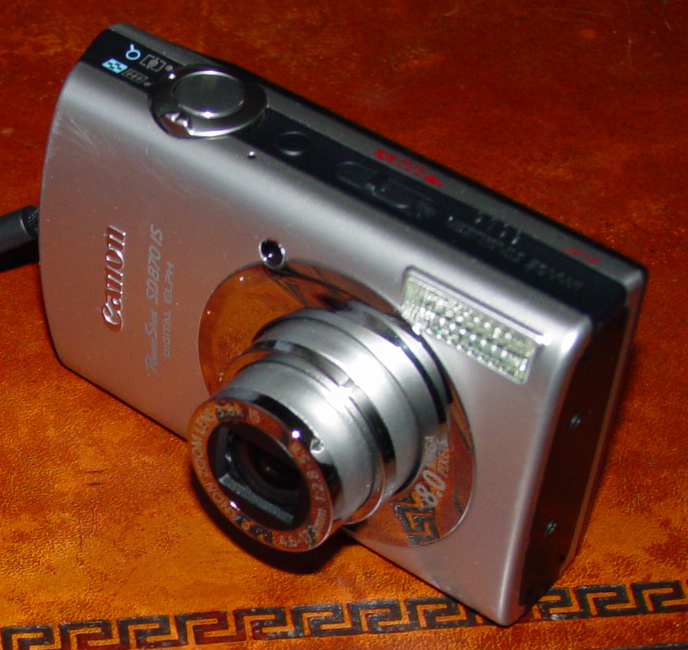 Canon Powershot SD870 IS Digital Camera |
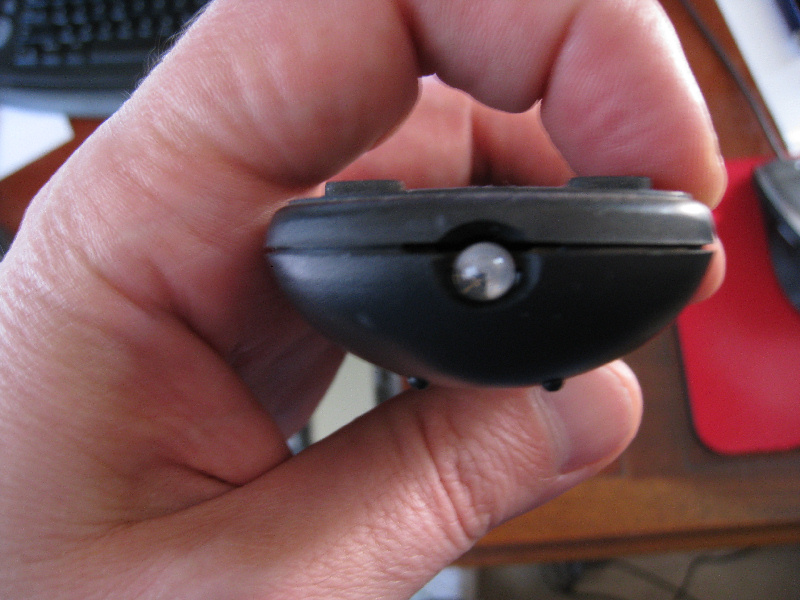 Remote control as seen by the naked eye. |
 Remote control as seen by the digital camera. |
You may be wondering about the picture of the IR ports on my HP48GX and HP50g calculators. I took them with a digital camera, a Canon Powershot SD870 IS. The remote controls for most electronics nowadays use IR (infrared) at a wavelength of roughly 950 nm (nanometers).
Most digital cameras, such as my Canon Powershot, use a charge coupled device (CCD) as the sensor. CCDs can "see" light waves up to ~1 um (micron, 10^-6 meters). Your naked eye, on the other hand, cuts off at about 760 nm (0.76 um). Thus, my digital camera can see light that my eyeball cannot. You can use this to test your remote controls. Simply turn your camera on, point your remote at it, and push a button on the remote. If you get a flash, your remote is probably working.
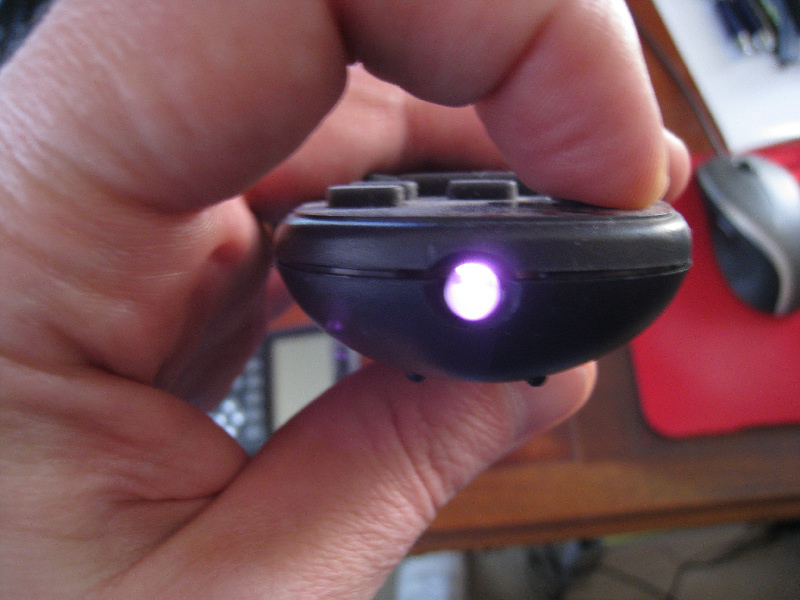
Printing with the HP50g Graphing Calculator
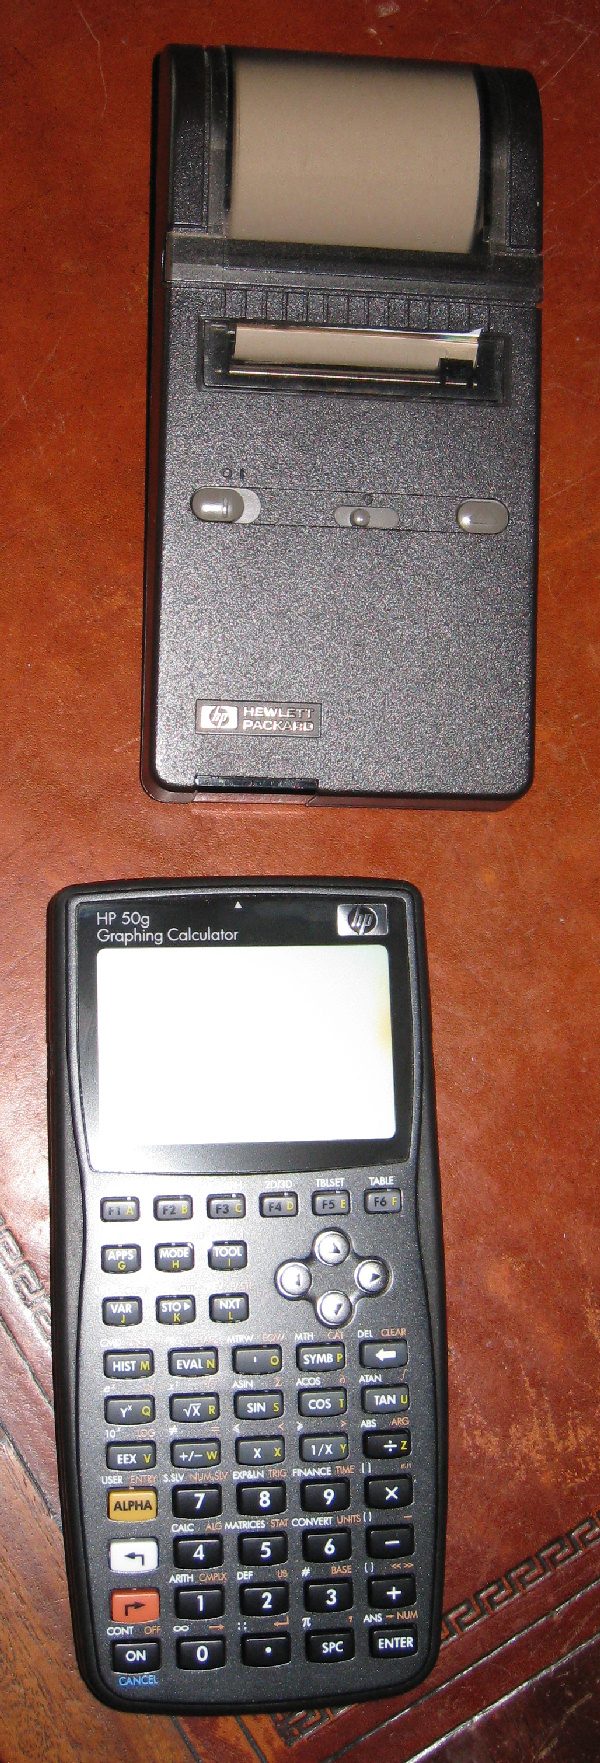 HP50g graphing calculator with HP82240 thermal printer |
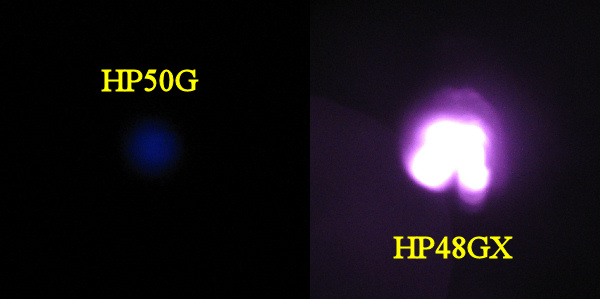 Images showing HP50g vs HP48GX IR transmitters |
Just got a new HP 50G Graphing Calculator. What I've already discovered is that the HP 50G has to be much closer to the printer (a HP 82240B Infrared Printer) than did the 48GX. To give you an idea of how close it has to be, look at the image. Note that it's about 1" (2.5 cm) between the calculator (the arrow on the top indicates where the IR port is located) and the printer. Through some quick trials, I've discovered that the maximum distance is about 3". The calculator is brand new, and the batteries are fresh. The distance will probably drop as they drain down. However, I'll have to test the current draw of the two calculators (HP48GX and HP50G) to see how much more current the 48GX requires. LEDs typically use a lot of current. Therefore, HP may have decided that most people don't need to print from a long distance and, therefore, they saved some battery life in the process. I'm not ready to see this as a bad thing. I do know that I replaced the batteries quite frequently on my 48GX when I did a lot of printing.
I used my digital camera (a Canon PowerShot SD870 IS) to do a quick test. The brightness of the LED on the camera screen gives an indication of its strength. The HP48GX, as you can see, is very bright. It almost saturates the camera. But the HP50G is so weak that I had to turn off all of the lights in the room to see it. This shows why I can print from the older HP48GX from over a foot (12" or 30 cm) away, while I have to be less than 3" with the new HP50G.
Mission:Impossible Wallpapers
I am a big fan of the original "Mission: Impossible" series. I have the first three years on DVD. I've started creating computer wallpapers based on the characters, my favorite of which is (of course!) Barney Collier (played VERY well by Greg Morris). Others will be coming in the future, when I get around to it in my copious spare time.
 |
Greg Morris as Barney Collier 1280x1024 1600x1200: This will also work for 1280x960, 1152x864, 1024x768, 800x600. 1920x1200: This will also work for 1440x900. 1920x1080: This will also work for 1280x720. |
 |
Peter Graves as Jim Phelps 1280x1024 1600x1200: This will also work for 1280x960, 1152x864, 1024x768, 800x600. 1920x1200: This will also work for 1440x900. 1920x1080: This will also work for 1280x720. |
 |
Barbara Bain as Cinnamon Carter 1280x1024 1600x1200: This will also work for 1280x960, 1152x864, 1024x768, 800x600. 1920x1200: This will also work for 1440x900. 1920x1080: This will also work for 1280x720. |
 |
Martin Landau as Rollin Hand 1280x1024 1600x1200: This will also work for 1280x960, 1152x864, 1024x768, 800x600. 1920x1200: This will also work for 1440x900. 1920x1080: This will also work for 1280x720. |
 |
Peter Lupus as Willy Armitage 1280x1024 1600x1200: This will also work for 1280x960, 1152x864, 1024x768, 800x600. 1920x1200: This will also work for 1440x900. 1920x1080: This will also work for 1280x720. |
We Begin Again
This is the all-new page that will take the place of the now-retired "Rants n Raves" page. Slightly new style. Same muddling.
My Purpose
It is my hope to address technical and engineering issues with this website. I'll try to keep to the facts (as well as I know them) and try to keep away from politicking as much as possible. I'll leave those rantsthoughts for my personal blog.